 Put lighting, angles and staging aside. The most important real estate photography tip in my opinion involves vertical lines.
I always like to start this conversation by showing the leaning tower of pisa. In our world, we see vertical lines as part of structures everywhere we look. Doors, walls and window frames are almost always perfectly vertical. Some rare exceptions are out there where the architect purposefully installed a curved wall or window, but for the most part we come to expect perfectly vertical lines.
If the photos you took of a property seem to be tilting to the left or right, we need to work on correcting our verticals. Here are the easy, simple steps to start taking real estate photos like a pro.
1. You need to be sure the camera is 100% level. A good tripod will have a bubble level you can reference to be sure the shot is level. Shooting with a level camera will straighten the vertical lines in the frame and make the resulting photo more pleasing to look at.
2. When you level the camera, you then have to lower the camera. Shooting real estate photos properly by correcting vertical lines means you can no longer shoot at eye-level as the frame would be ceiling heavy. Lower the camera to waist or just above waist level to get the important details of the space in the frame.
After shooing quite a few, probably about 3o houses when I first started, I had another photographer point this out to me and it was certainly an eye opener. This is just another concrete evidence of doing the right way!
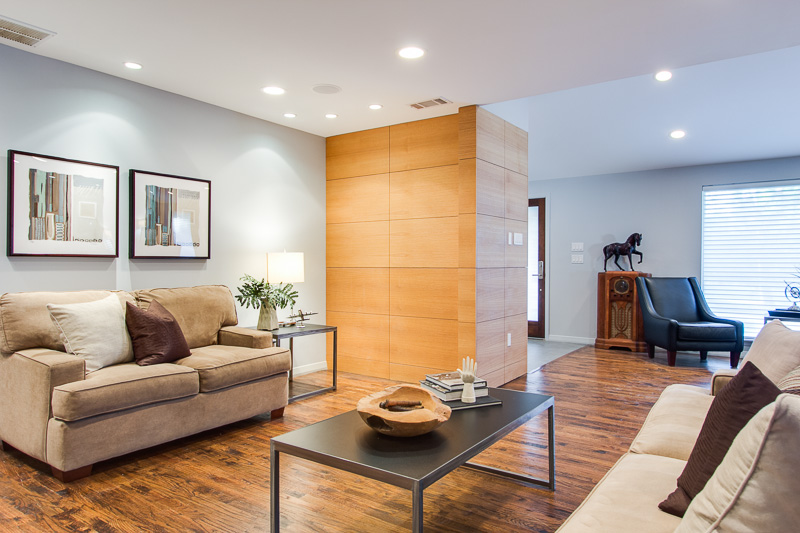
Also loved the plant idea to cover the camera, brilliant!! I have trouble with these types of photos into the mirror.
Exactly David! When I look back at my first shoots I cringe. It’s all a learning process – we all start somewhere!
I just discovered your website and I’m looking forward to reading EVERY WORD! I’ve been shooting real estate for just 9 months but I LOVE IT! It’s amazing how much there is to learn about photographing interiors and architecture.
Glad you found the site Joni! Enjoy reading!
thanks for the tip, great site!
Thanks Mike 🙂
I’ve never really understood the concept of getting your camera level. I’ve just always framed my shots while paying close attention to keeping the verticals straight. I align the viewfinder grid with the edges of walls or other things that should be vertical. I’ve never relied upon using a bubble level because I’ve never had faith that the floors are 100% level. But I guess I just wasn’t thinking it through completely.
Through life circumstances I have had to put my portrait business on hold. I was just approached by a real estate agent to possibly be his exclusive photographer. I have my first house tomorrow and I can not tell you how thankful I am that I stumbled upon your site. Your information has been so helpful and has helped me regain my confidence. Thanks!
Good to hear Amy! Hope everything went well!
just found your site i have just started out an have my firs shot next week ..great tips ..ive been a photographer for a little bit now ….find your site very informative cheers heaps
Glad you found it Damian, good luck!
Hi Lance, thanks for the video and tips, I’ve just finished watching your video on creating a twilight scene from multiple exposures. This is an area where clients go ga-ga over great shots and gets great kudos when done right. I was trying to figure out how to afford a $300 online course where I could learn how to do this (amongst other things). Your site (and this video) has saved me this amount and probably earned it back too!! Thanks for the tips on the site. I’ve been in business since february ’14 and love every day of my new venture. The dumps and the jewels certainly add spice and interest to every project. Thanks for the tips
Thanks for the kind words David – glad you are getting use out of the content!
Lightroom and Photoshop have tools to straighten verticals and horizontals, so it’s not necessary, nor is it desirable, to shoot every frame exactly level.
Correct, however it takes an understanding of what “level” is and how adjusting verticals/horizontals changes your photo, before you can purposefully shoot off-level and make corrections in post (like you would to fake tilt/shift, etc).
the LR auto align is pretty awful and I would never ever ever ever rely on it
haha Totally agree Thomas! I have hit the auto align in LR recently and it doesn’t even come close most of the time. So much easier to just do it right on-site, or make minor adjustments manually in post.
Once you get the Canon TSE lenses you will never go back to zooms…
I just discovered your website. I’ve been studying every your article for past few hours. IT”S ABSOLUTLY AMAZING – SO MUCH INFORMATION. Thank you very much Lance!!!:)
Glad you found the site! Thanks for the kind words!
Thank you so much for sharing your time and information…… I have had so many “aha” moments!
You’re welcome Connie, thanks for the kind note! I find even I will forget some things and when I re-read them on the blog I’ll understand what I do what I do. It comes natural after doing it for quite a while, but it’s always good to refresh and look back at things and adjust where necessary!
As good as Photoshop and Lightroom are at correcting verticals, DXO Viewpoiint is much easier and faster.
Very cool, never heard of DXO Viewpoint – will have to see what it’s all about! If you shoot level you shouldn’t ever have to make many corrections. But it’s good to know software is out there that makes it easier!
Is there a difference in using the “virtual horizon” in your camera & using a bubble level? I have set my FN button to bring up the VH & would like to save the eXtra space in my bag.
Thank you!
(Love the blog)
There probably is, but you could do a test. My gut would tell me that even if you point down at a 45 degree angle, as long as your camera is not tilted to the left or right the virtual horizon line will be green/balanced. Because I think all that tests, is the horizontal tilt of your camera…not the vertical. We want the camera to be 100% level and facing directly forward, not pointed up or down. Give it a shot though and test it out. If you can point the camera down at a 45 degree angle and still get the virtual horizon in check/balanced, then it’s only preventing you from tilting left/right when you need to be focused on not tilting up/down as well. 🙂
Thank you.
It does left-right whend the FN button is pressed. But, it shows forward-backward tilt if you access it through the settings. I might just save the space in my bag & press a few extra buttons.
Awesome, is that with a Canon? I had no idea you could do up/down via settings!
Lance,
Thank you for all the useful tips. Starting up any business can kind of be unnverving but we have always felt that it was the right choice for us. Quick question (that’s a loaded statement): Can you explain the sunny 16 rule to me in plain english?
Hi Nick,
I have never heard of the Sunny 16 rule so I had to Google it, and it does look confusing! Because I just bracket photos and blend together, I don’t need to get the exposure right. I instead rely on “chimping”, to find the correct exposure the less technical way…using my eye.
Lance,
Thanks for responding. I really rely on my visual over technical eye when taking the majority of our photos as well.
Do you find that using a wide angle lense gives you a distorted perspective? I just started in real estate photography and whenever i used my 35mm i have to correct the verticle lines using “lens correction” under the filter menu. Is there a way around this?
Distortion can happen pretty easily at such wide angles. I try to shoot at 14mm minimum on my 1.6x cropped camera (22.5mm 35mm equivalent) to avoid major distortion. But distortion and perspective issues will most likely be visible if you know what to look for, especially in the corners. The verticals will usually be vertical at that angle, needing little correction. Although I do utilize Lightroom’s Lens Profiles to auto correct minimal distortion/vignetting.
I’m a photography student trying to get into the real estate photography market. I’m currently working on my first real estate assessment and I’m so grateful that I found this site! My trainers haven’t given me any information on best practices etc., so all of this information is like liquid gold to me right now! I have my first shoot coming up and I think I just learned more in the past hour I’ve spent here than in the past two years of study!
Thanks for the kind words Ange, glad you found the site!
Hi Lance. Like everyone else visiting your wonderful website, I am blown away by this resource you have created and gifted to the photographic community. I am currently in the process of starting a realty photography business and am trying to decide what gear to buy. I have been shooting wildlife and landscape for a few years; I am in the process of upgrading to the 5D-S wih a 16-35mm/f2.8 lens. The files are way to big on the 5D-S to be using for real estate, so I was considering the 6D – smaller files still with a full frame sensor…and I could use the 16-35 on the 6D as well. I was surprised to see that you use a 60D; I was thinking that a full frame would allow for wider angles, but perhaps the really wide angles create too much distortion for realty photos anyway? ( I did see this happening when I rented the 6D and used the 16-35 on wide.) And doesn’t the 10-22 translate to the same thing as a 16-35 on the full-frame? (On your LR Enfuse video I noticed you were shooting at 14 and 15mm but I am assuming that was on your 60D and not your 5D?)… I find all this cropped sensor/lens selection stuff a bit confusing.
Perhaps more importantly, aren’t the L- lenses that come with the 6D better quality than the S-lenses with the 60D? I like the economics of going with your setup of the 60D and 10-22mm if I am not sacrificing any quality in the images; though there doesn’t seem to be any problems with what I see you shooting on your videos and website. At the end of the day, I don’t mind paying a few extra bucks for a better product but I also don’t want to spend extra money for more than I really need. I feel a bit in the dark here…could you please shed some light. Should I go with the 6D and use my 16-35/f2.8 or add the 17-40/f4. Or should I go with the 60D and the 10-22mm? I appreciate any advice/info you might care to share.
Thanks so much.
Hi Tim,
Glad you found the site! To make the answer short, I would go with the 6D and 16-35/17-40. I don’t use the 60D anymore – I just upgraded to a 5DMKIII a month or so ago. So I retired the 60D in order to go full-frame on the still photo aspect of what I do. (Previously, it was just limited to video work.) The “wideness” on both is the same. It all depends on how wide you shoot. Both cameras/setups can shoot ultra wide, and both can cause distortions, etc. With the 60D, I would shoot around 14-15mm, which you are correct, that was just the focal range of that lens. The full-frame, 35mm equivalent is 22-24ish. So when I shoot with my 5DMKIII, with the 17-40, I shoot around 23mm at the widest.
The L lenses are definitely better quality, but can you notice? That’s the real question. If you can, then you definitely want to go that route. If you can’t (I can’t), then it may not be a bad idea to save some bucks. It really comes down to what you think you will be happier with. Both setups will get outstanding results, especially for our purposes (real estate).
Good luck!
Great site! I’m a wedding and portrait photographer but because of my background in real estate, I’ve been shooting a lot more real estate lately. When I first started I was using a 7D and Tokina 11-16mm 2.8 lens. I’ve upgraded my camera to the 5DMKIII and use my sigma 24-70 2.8. I absolutely love the crisp picture quality but found that the lens just wasn’t wide enough for tight spaces. Using the 11-16mm lens doesn’t work because of vignettes around the edges and results in a lot of cropping even after using lens correction in LR. It’s interesting to me that even with the 17-40 that you’re shooting around 23. I’m at the point of needing to make a decision on a lens to purchase so that I can use my 5DMKIII more often. Any feedback would be great.
Hi there,
Yes I stay at 23 because I don’t like the distortions and perspective issues when going wider. Perhaps you can rent a 17-40 to give it a run through before purchasing?
Lance, I’m from Spain and I have reached to your site by chance. I’ve spent some hours now surfing your site and your other facebook pages. Congratulations for all these sites and publications and for your exceptional photography skills. You are a perfect teacher, the material is super useful and interesting and in summary: you are a great man, so generous and humble!!
You deserve an aplause.
Thank you for the kind words!