Previously I have shared how to edit/process natural-looking real estate interiors with the Enfuse plug-in for Lightroom. A lot of readers have asked for help with another method of processing real estate photos, using the software Photomatix. So I went and purchased Photomatix and came up with a workflow that I would like to share. Here we go!
(If you haven’t yet gone through my previous series please check out the first article: Real Estate Photography Tutorial – File Management – Start to Finish. It covers file management, a shot list/guide and processing with Lightroom/Enfuse.)
I’m going to get right down to business and share a video I put together of me editing a couple of bracketed photos. Give the following Photomatix tutorial video a watch and continue on to find out what settings I use, how I created the presets, etc.
Lightroom Setup – Importing
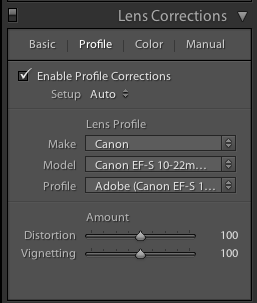
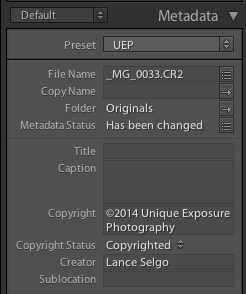
In the video the first thing we do is import our photos into Lightroom. You’ll notice that when I import, I apply two things:
Develop Settings: Auto Lens Profile
Lightroom Setup – Exporting
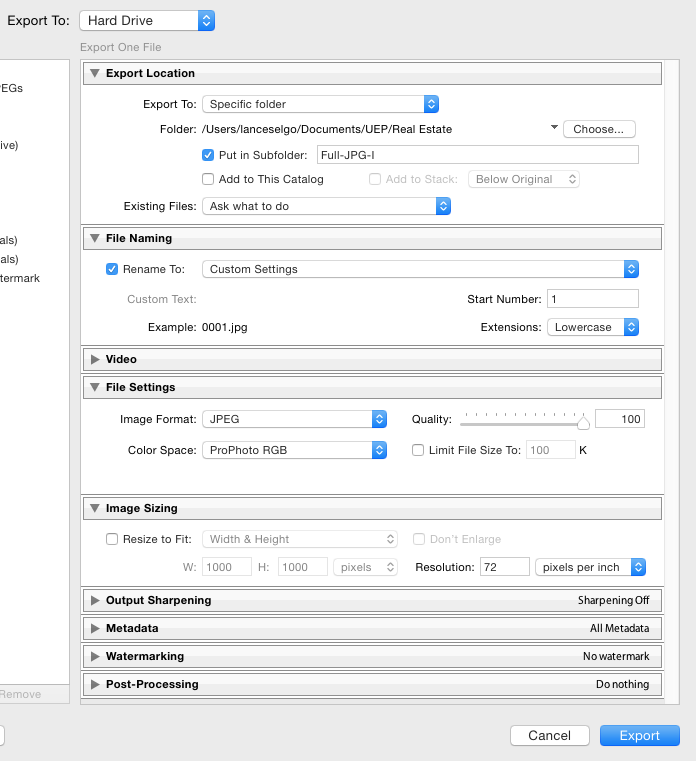
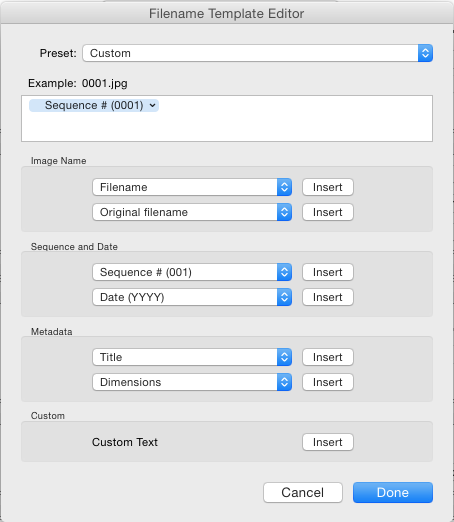
I export full-size JPGs before batch processing through Photomatix. The main points to note are the export is full-size, no cropping, at 100% quality with type JPEG. I also adjust the naming and specify a subfolder to keep things organized but those adjustments can be modified to suit your needs.
Photomatix Setup – HDR Preset
In order to batch process within Photomatix, you need to create an HDR Preset that will be applied to your blended photos. To create the preset, do the following:
- Open Photomatix
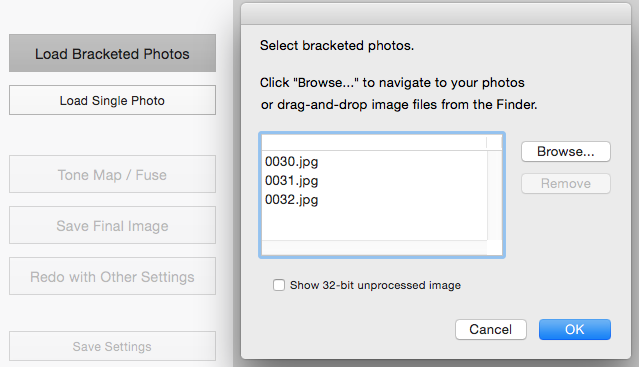
- Click the Load Bracketed Photos button
- Click Browse and select a group of bracketed shots that you have exported from Lightroom in the above step (in my screenshot example, I have loaded 3 bracketed frames of a single shot)
- Click OK
- In the Merge to HDR Options box, keep everything UNchecked, and hit Merge to HDR
- Once Photomatix has merged the images, you’ll see a preview of the end result
- Select Process: Exposure Fusion
- In the Method dropdown, select: Fusion/Real-Estate
- Change the settings for Highlights (-10), Shadows (10), Local Contrast (0), Color Saturation (0), Highlights Depth (4)
- Click on the Preset dropdown and select Save Preset…
- Give your preset a name
- Close the Adjust & Preview window – we don’t need to process this photo as we were just going through the steps to create the preset
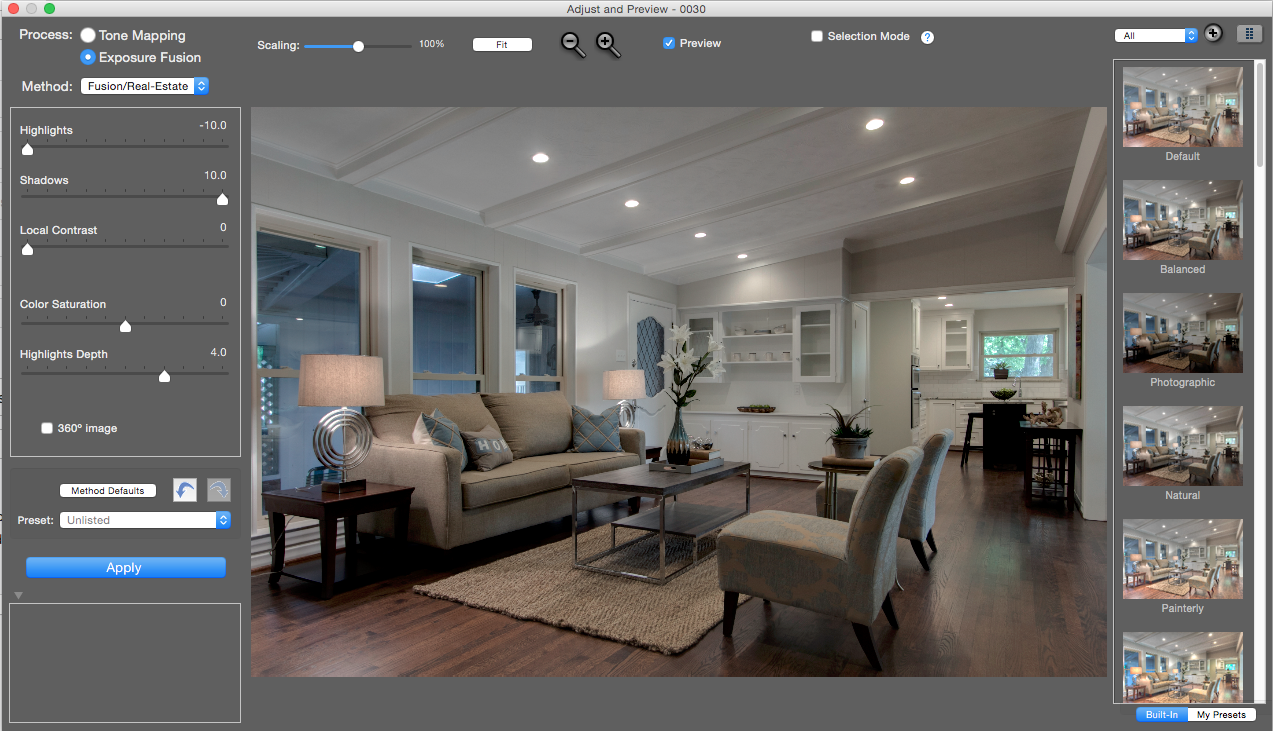
Feel free to play with the various methods and settings! By no means is the above combination the perfect way to go. You’ll have to play with it to see what gives you the most highlight detail, while also a rather balance image. I noticed it tends to get really contrasty quite quick so keep an eye on that. I think the Fusion/Natural method has potential, but it seems to lose quite a bit of the highlights which in our case we want – for window views.
Photomatix – Processing HDR Interiors
Now that we have a preset ready to go it’s time to process our bracketed images! Open Photomatix and go to Automate->Batch Bracketed Photos… In the box provided, adjust the following:
Preset: <Select the preset you named/saved in the previous step>
Advanced Selection (Options)
Check this option and click the Options buttons. Check Bracketed sets may have an even number of frames and change the bracketed sets from 3 to 7 frames. (This is assuming your brackets fall within that range. Adjust where necessary. If you take a photo of a dark space like a media room and your ending exposure is longer than 2s, you may need to bump up the maximum time between bracketed frames for Photomatix to find that bracketed set correctly.)
Select Source Folder…
Find your directory where you exported all of the Full-Size JPGs from Lightroom in the previous steps
Custom Location (Choose Location…)
Choose a custom location for where the blended images will be saved. I create a new folder called Edited to store them in.
Hit Run
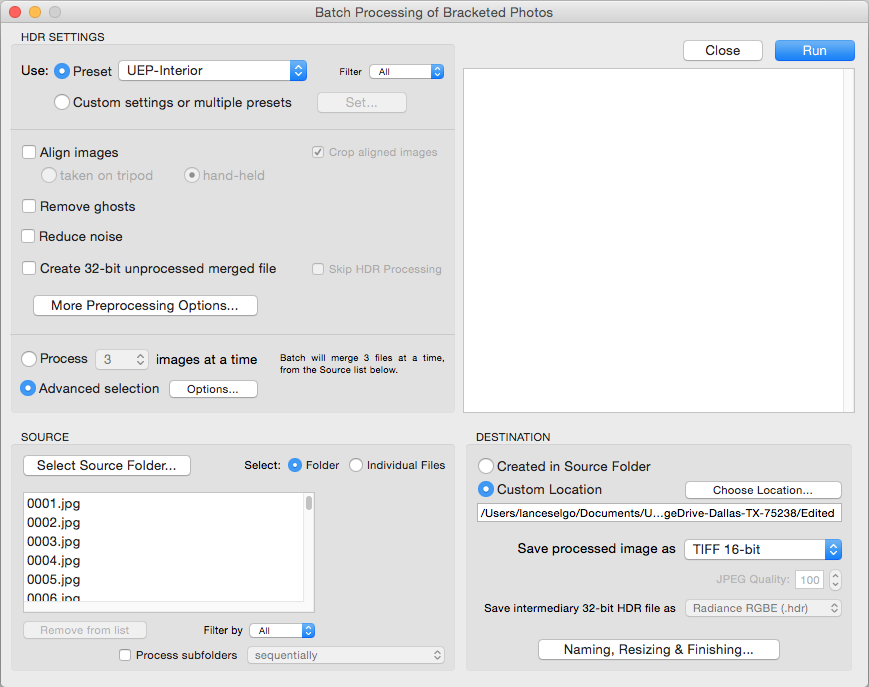
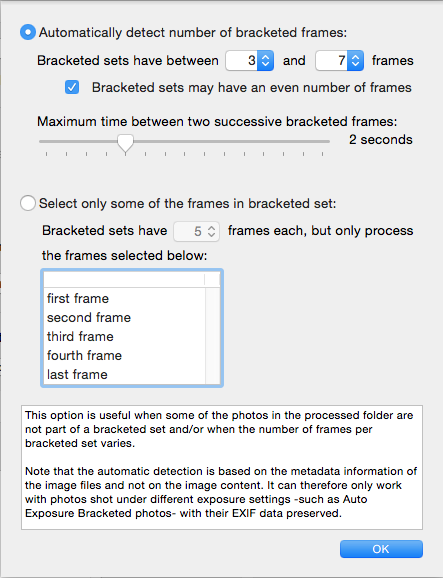
All of the other settings should be safe as their default values. Feel free to compare my screenshots with yours in case any of the defaults have changed.
You’ll notice Photomatix is screaming fast! It literally only takes about 6-7 seconds on my machine to process a bracketed set. A set of 30 photos takes roughly 4 minutes or less to process!
Final Adjustments With Lightroom
As noted earlier, our “out-of-the-box” photos from Photomatix probably won’t be representative of the quality we want to deliver to our clients. I tend to like lighter/brighter photos. We need to import back into Lightroom to tweak our photos before exporting for the client.
Import back into Lightroom, and choose one photo to edit under the Develop module. Make adjustments to your liking. In my case, I tend to start around:
Exposure: +1.20
Contrast: +6
Highlights: -65
Shadows: +48
Clarity: +15
I use those settings as a base, and then I adjust on a per-image basis where I feel some images need some additional help. I encourage you however to come up with a base, and then save it as a Develop Settings Preset like we did for the Auto Lens Profile! This way when you are done processing with Photomatix and you import your photos back into Lightroom, you can automatically apply the base preset on Import.
Photomatix VS Enfuse
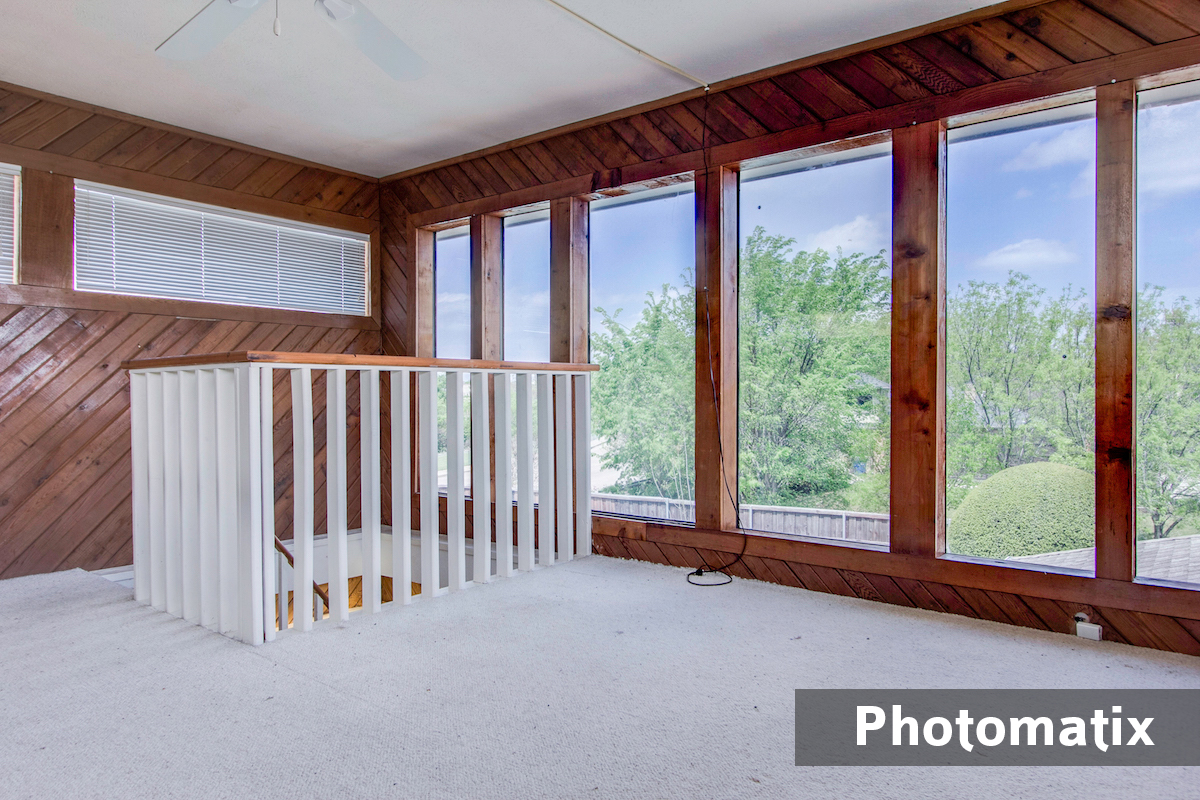
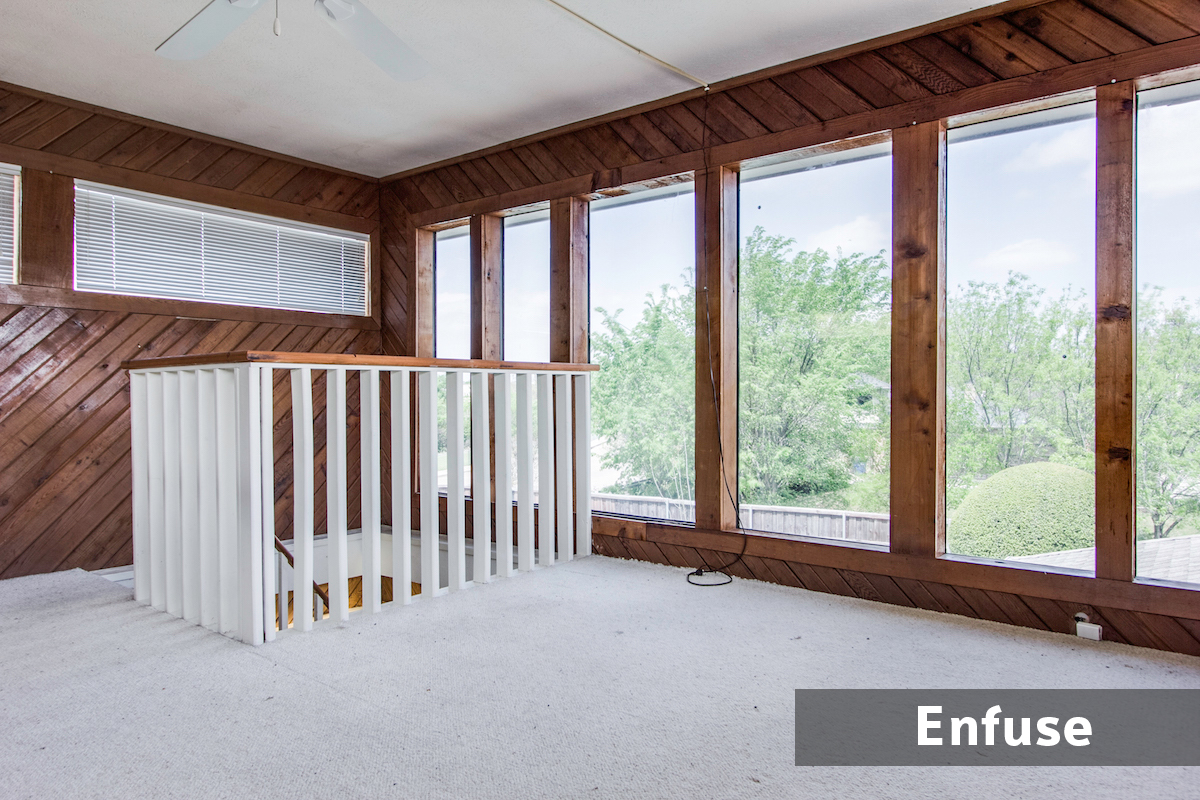
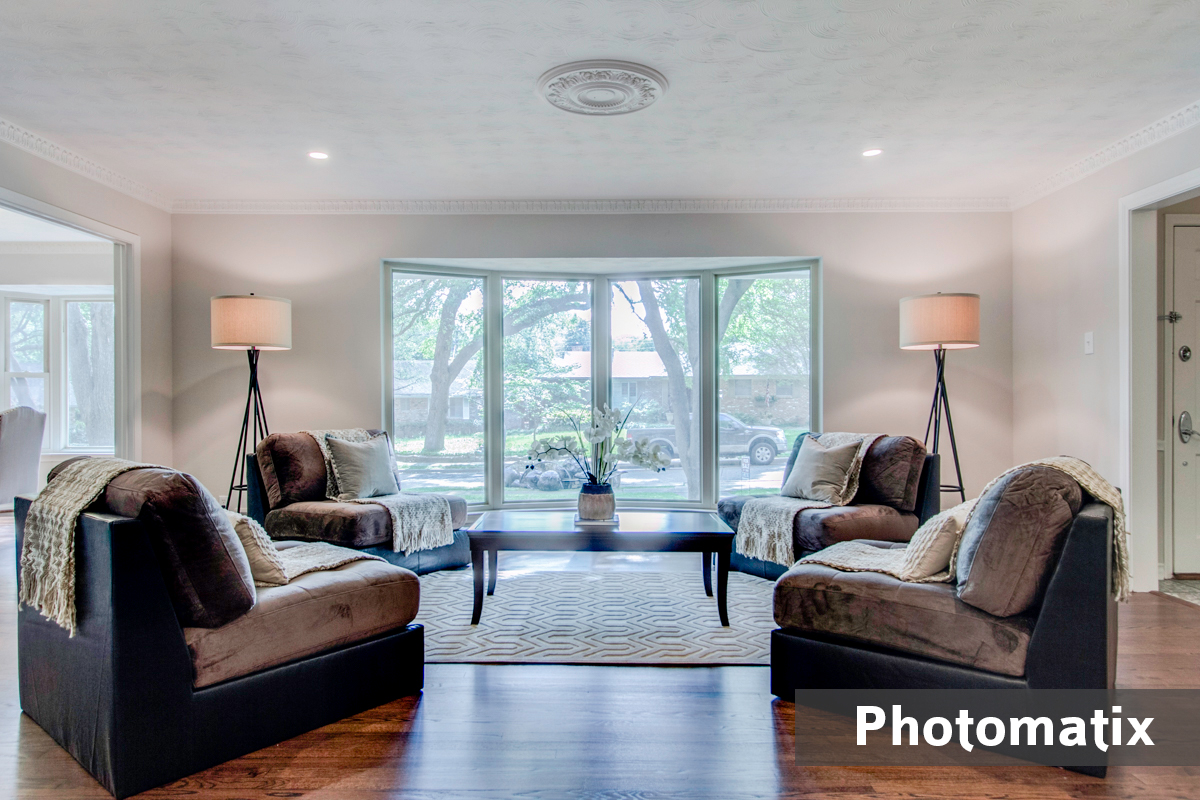
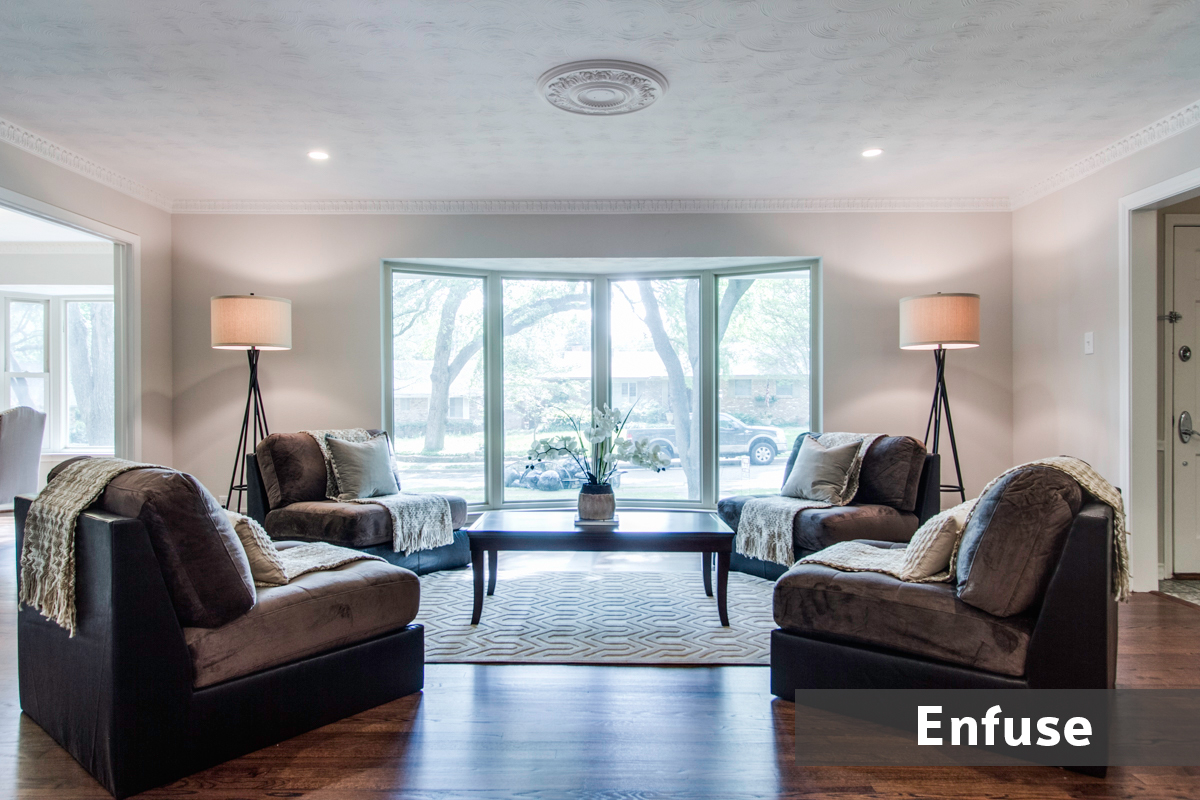
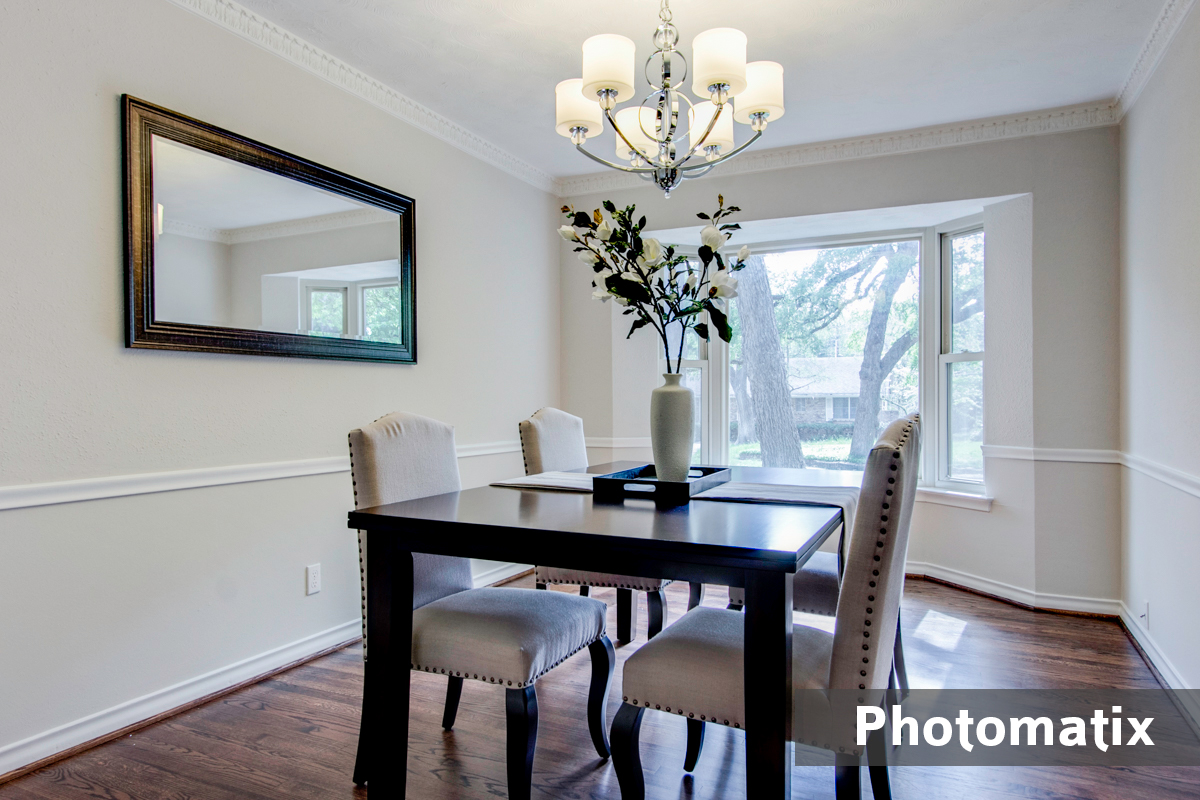
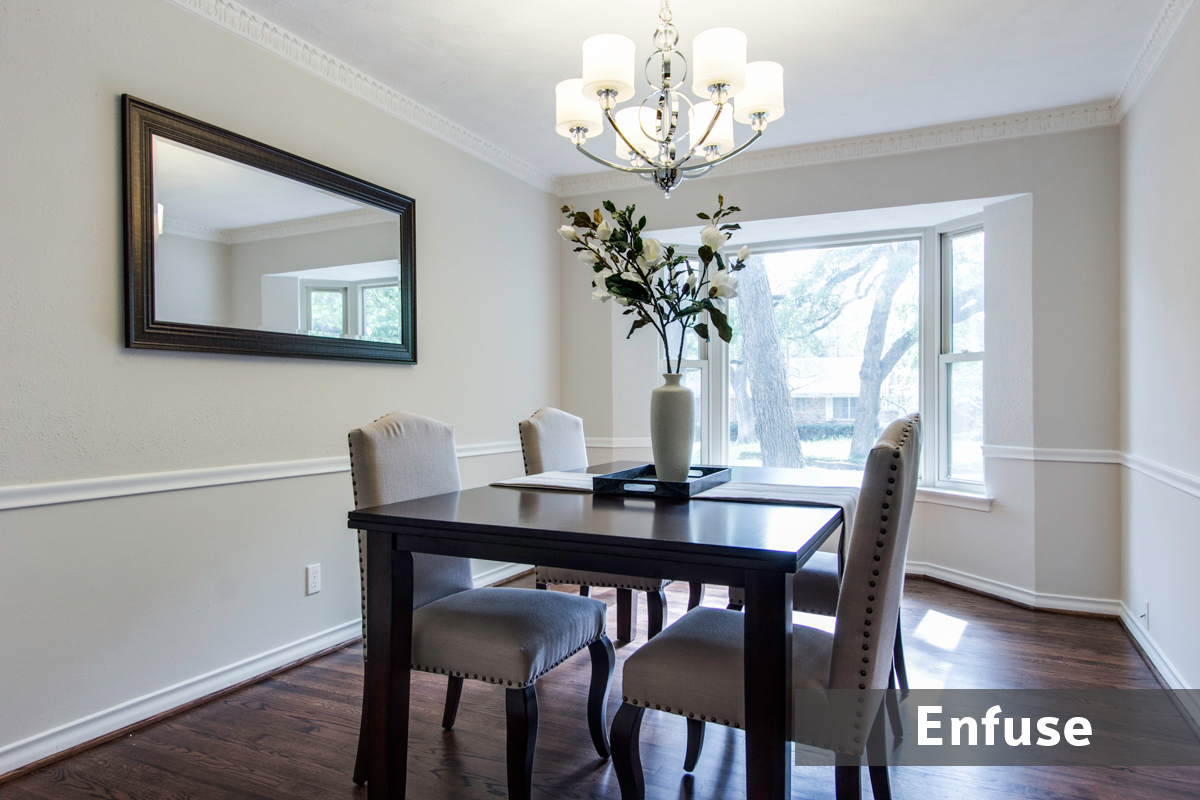
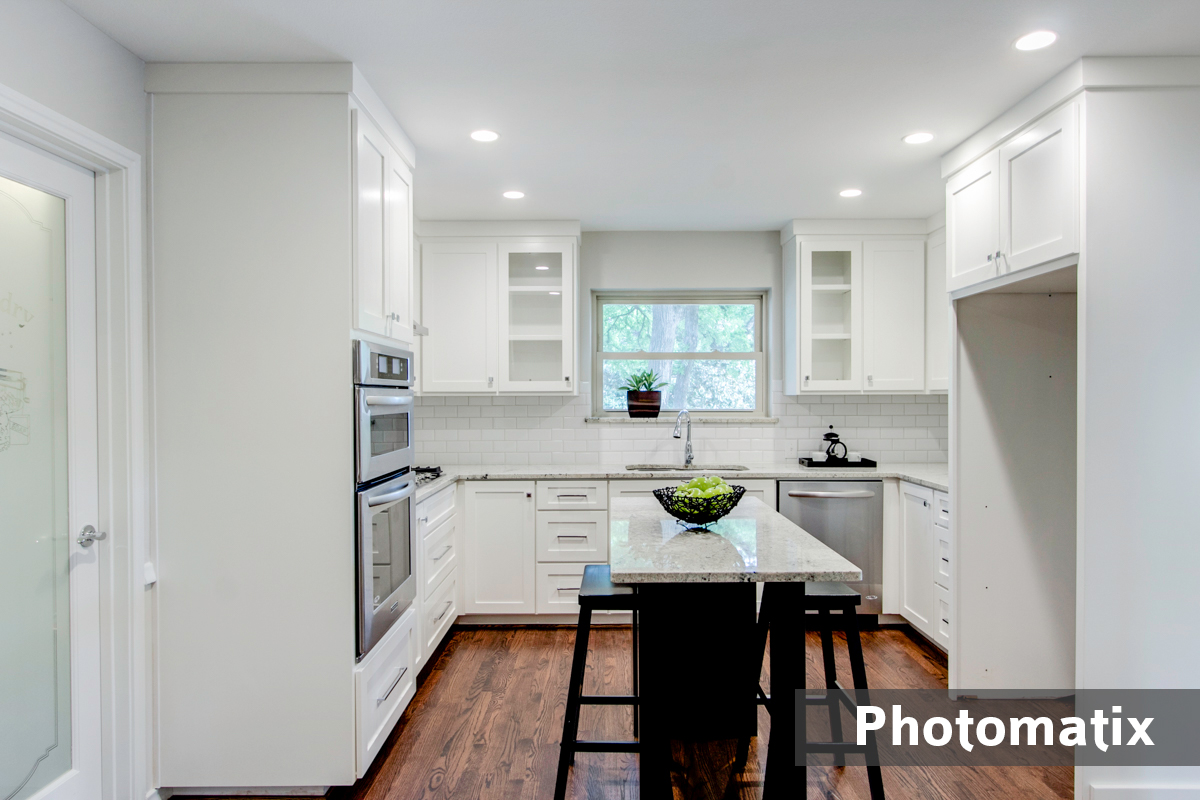
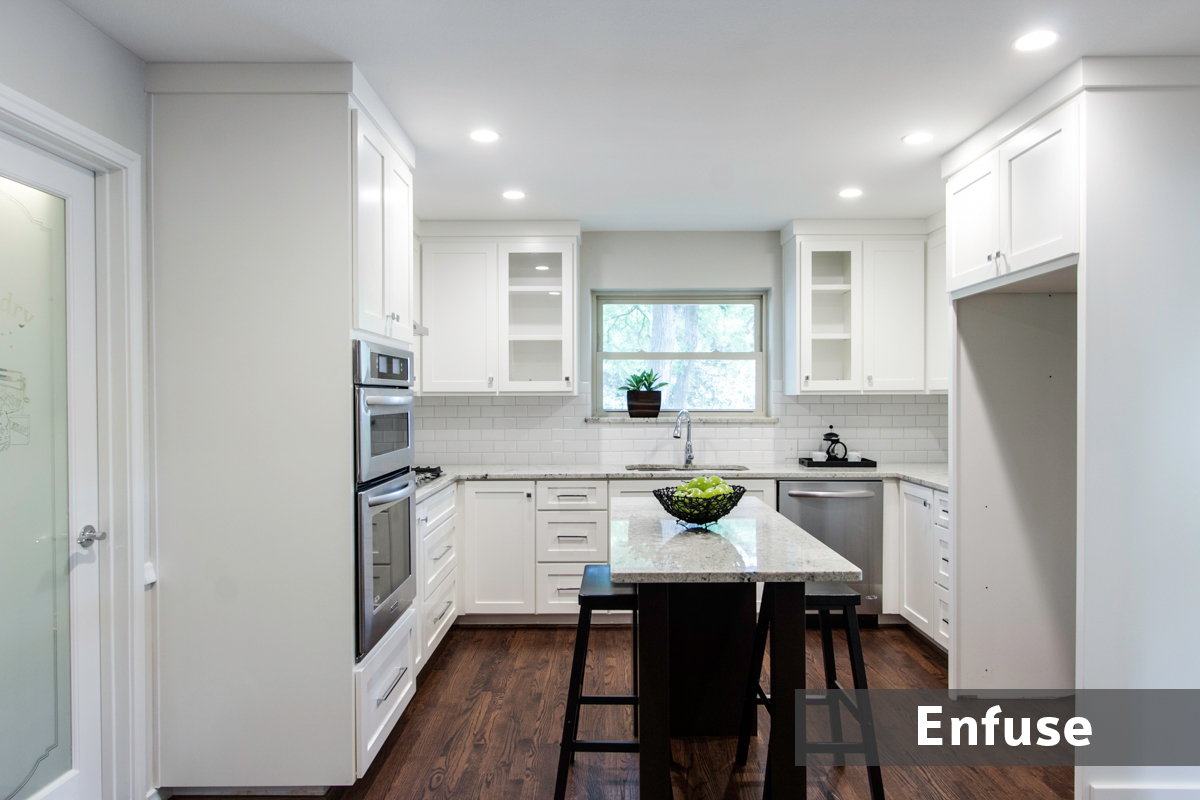
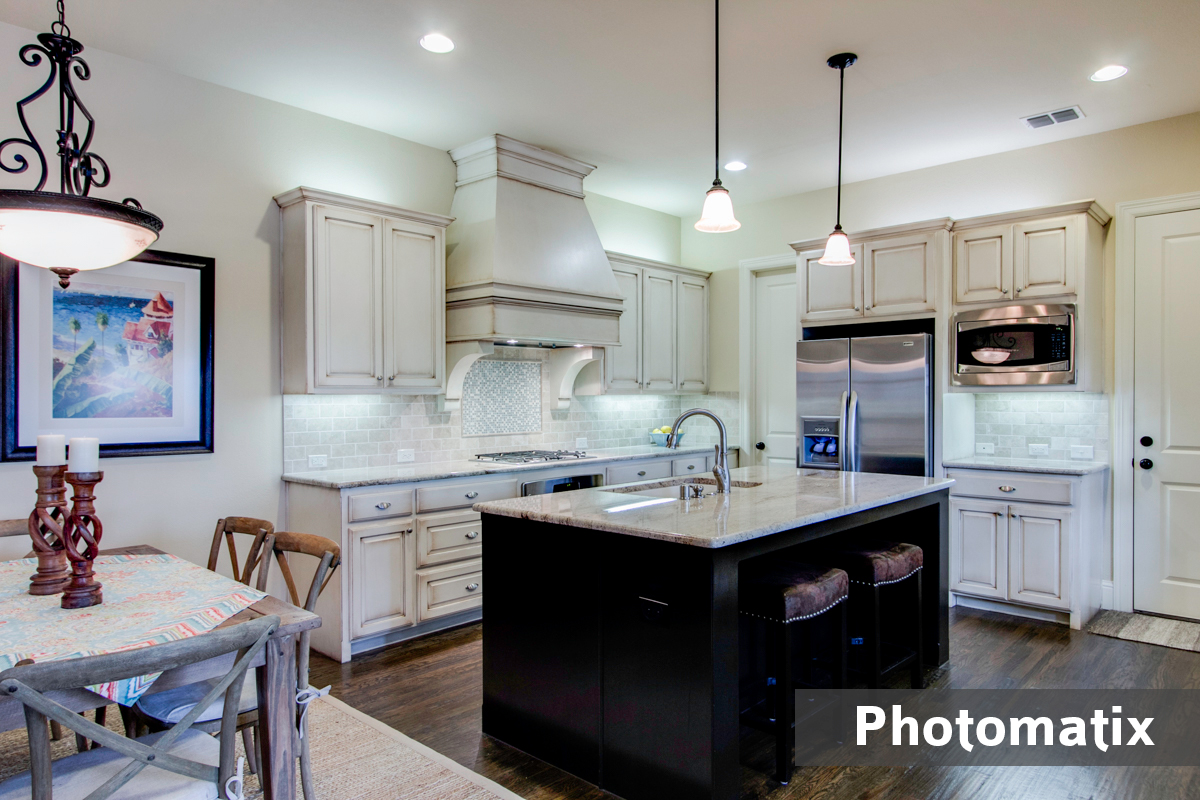
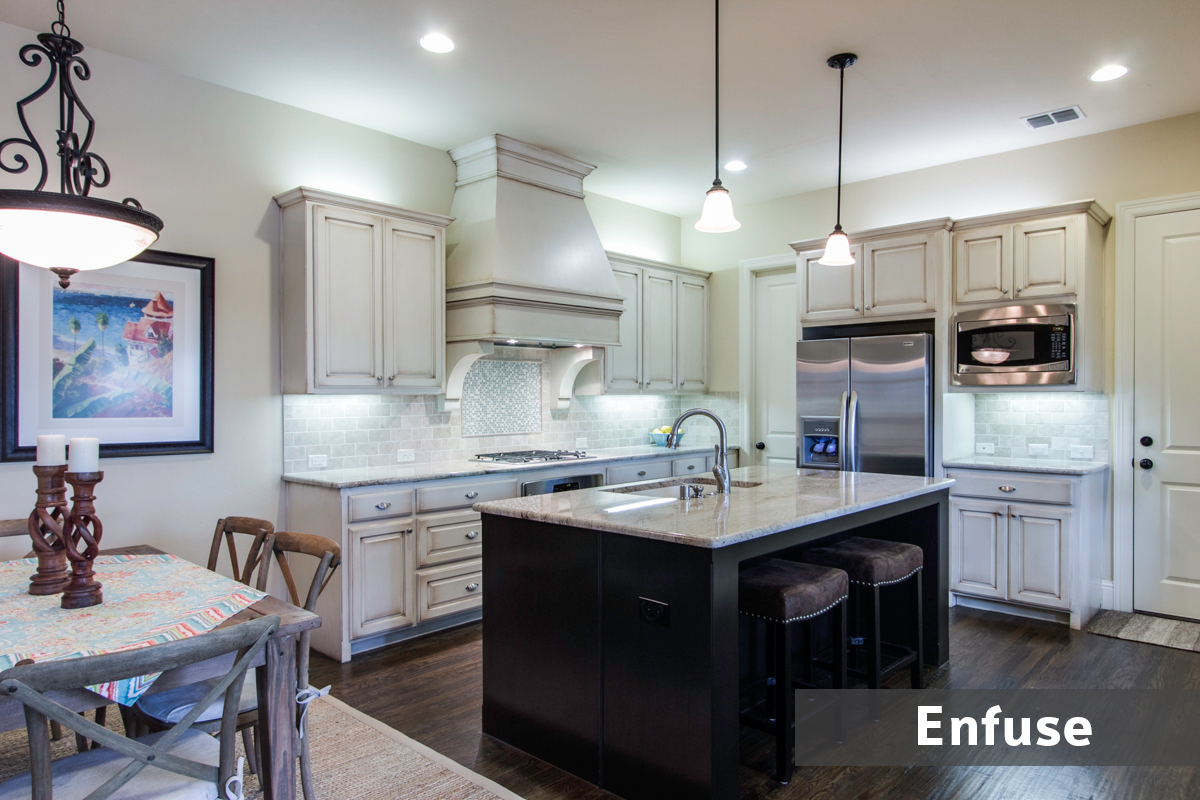
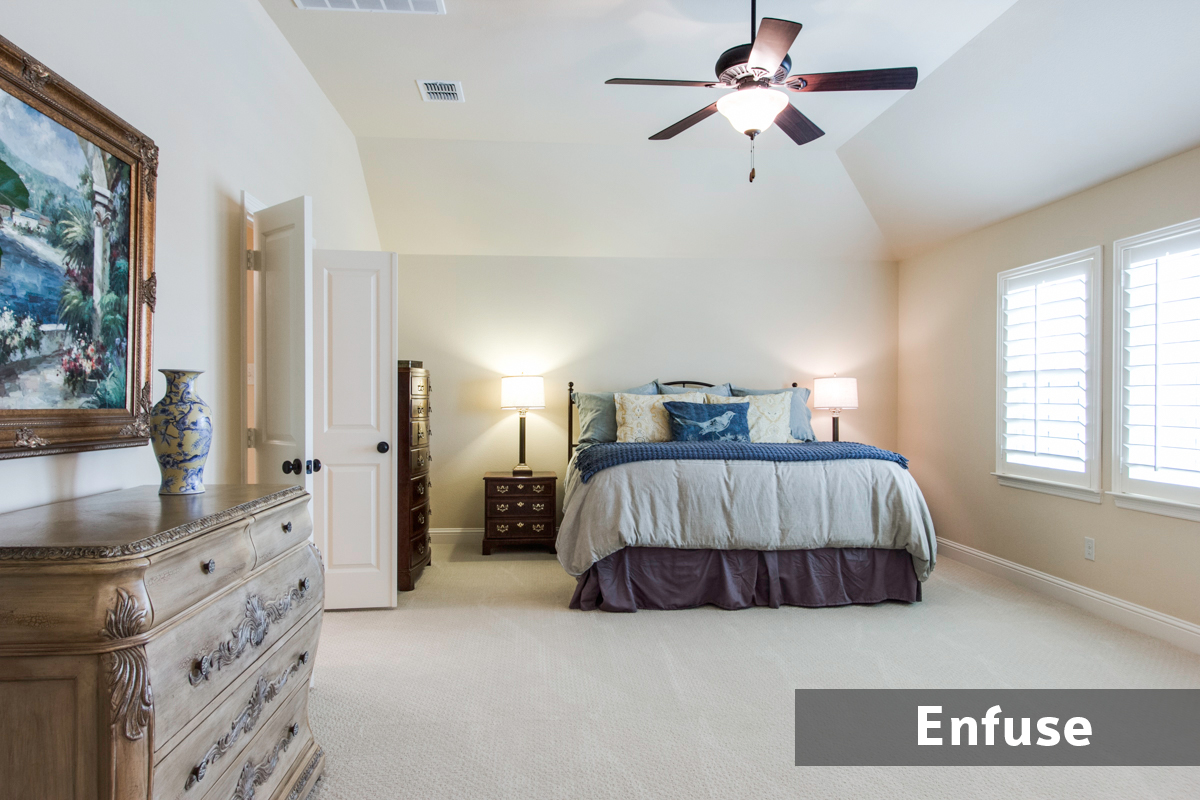
Below are a couple of examples of photos that I edited where I utilized the same exact brackets to process both in Photomatix and Enfuse. I tried to maintain brightness between the two comparisons. You’ll notice the majority of differences are in the highlights either out the windows or on light fixtures. You’ll also see differences in the darker portions of the images.
Photomatix Coupon Code
Honestly, the cost of Photomatix should be LESS than the cost of a SINGLE real estate photography shoot for you. It should be a no-brainer to purchase a piece of a software that your business is going to rely on. However I’m like you, if I can get something for cheaper, why not?! The kind folks at HDRSoft have given me a discount/coupon code to pass along to my readers to save 15% off the software. Enter the coupon code at checkout to purchase Photomatix cheaper than I got it for!
REPhotoTips
(15% off Photomatix)
Don’t forget, you can download Photomatix and use the fully functional software for eternity! It’s just not very business friendly with the watermarks that get put on it. 🙂 It is definitely worth the download though so you can test it out and see if it’s something that your business should invest in!
What Are YOUR Tips?
Do you have any Photomatix or Enfuse settings that you use and get great results with? Share below in the comments – I would love to hear from you!
Hi Lance! I am curious if you can speak to processing times of Photomatix vs Enfuse. My current bottleneck in processing is Enfuse; I do very much like the results, but it takes F-O-R-E-V-E-R to run a set of 40-ish brackets from a large home. I am processing 6 or 7 shots per bracket, and considering modifying (reducing) that, but I start losing detail with 3 shot brackets. I am still experimenting with 4-5 brackets, but then I have to figure out how to shoot that easily… an ongoing process for sure!
Your Enfuse tutorial is what got me well on my way into real estate photography, and for that I cannot thank you enough.
Cheers,
Paul
Timely, article! Going to try this out Monday on my next shoot. Have been doing everything by hand and really looking to save some processing time with this. Thanks for the tips and setups.
Good luck!
Lance….I’m not sure why you convert the photos to jpg before merging in Photomatix…I convert my raw images to dng upon import to Lightroom, and then adjust WB and run the photos thru Photomatix and then edit the merged tif final image….why is it that you are you converting them to jpg first..just curious…and Thanks for the tutorial….
Kenny…..Amarillo, Tx.
Hi Kenny, no reason. If anything, it would be speed? I haven’t done any tests, but I would imagine the DNG is a significantly larger file size? But if the end result is a file with a dynamic range that is more editable within Lightroom, it would be worth it – I just haven’t done any testing to see the difference!
.DNG is a “wrapper” that combines the original image file and the .xml sidecar file with your edits, keywords, etc. It’s super handy if you ever have to rebuild a corrupted Lightroom library. Adobe created it to work with all of their software. It might be an open standard, but I can’t remember.
Bottom line, the file sizes or only a few kb larger to include the extra information.
*thumbs up*
Kenny are you exporting them as DNG files from Lightroom to a folder on your computer and then batch prossesing them in Photomatix? I can’t seem to find a way to export the files from Lightroom directly to Photomatix for batch processing. It seems that you can only export directly from Lightroom to Photomatix for a single set of brackets, not “batch processing”. Any help is much appreciated!
Vinnie,
That’s how I do it – just export everything out of Lightroom to a single folder, and then run a batch process via PhotoMatix.
Thanks Lance! Next I need to figure out the best way to send my clients a link for a gallery slideshow that’s MLS compatible.
There are a lot of options for tour links. Tour Buzz, Tour Factory, PFRETour, ViewShoot (disclaimer, it’s mine!).. Just have to figure out what works best for you and your clients. 🙂
Why on earth would you export from Lightroom to Photomatix and then back into LR? Photomatix totally screws up the colors…. Lightroom should be done last! GEEZ!!!!!! I have been doing this for 5 years. YIKES!! And TIF is the way to go, not JPG. Sorry, that’s as nice as I’m gonna be about!!
How do you deal with color casts when working with HDR/exposure fusion?
Nevermind. Found your other video
I see you found another video! But yes, color casts are very difficult when blending with HDR/Enfuse, because we are relying on the interior lighting to light up the space. The colors those bulbs put out are usually not ideal, so it’s very difficult getting a true, accurate color. We can do the best we can though, and use adjustment brushes to either warm/cool areas, or tint with green/purple to make minor corrections. 🙂
Hey Lance, love your work! You’re a great help.Out of curiosity, what mac do you use? Also, are the presets for exterior shots the same or, if not, how do they differ? Thanks man!
Hi Justin,
I use a MacBook Pro for video editing, and a MacBook Air for all still editing. Exteriors usually don’t require as much adjusting. I would recommend just blending some together (I prefer Enfuse usually over PhotoMatix for exteriors) and just adjust contrast/highlights/shadows/saturation to get something you like.
in your photomatix video, you merged 7 images. How did you do this with a 5d mkII? The camera only allows 3 hdr images??
I use the Promote Control!
Hi Justin,
as far as converting images to jpg first, this is the only way to retain the white balance settings that you made using Lightroom, right? If you batch import raw files into Photomatix I’m thinking it won’t import any adjustments that were made.
Great info by the way!
Thomas —
I’ve been using a (remarkably similar!) Photomatix workflow for a few years now, and you are exactly right.
Not only will you not capture any WB adjustments, you’ll also miss your lens profile corrections. That was the big one for me, because you can’t then use LR’s auto lens profile tool on the resulting TIFF file produced by Photomatix — the metadata isn’t there. So much easier to just do the extra export step.
Great info, Lance — thanks for sharing!
Hi Lance, Nice work on this Tutorial. Do you find that using a gray card helps with getting better WB when shooting interiors?
Thanks…
Hi Mark,
I’m sure it would help, but it would require taking a photo with the card and then without in order to get that white balance set. With my workload and the need to be in-and-out, I just rely on my eye and clicking on neutral elements in the shot during processing to set the white balance.
Hey Lance, Extremely helpful blog! Just wondering what your Lightroom/Photomatrix preset is for exterior shots? Thanks
Hi Adam,
I find Enfuse gives a better resulr for exteriors usually, and I use the same settings as interiors.
Hi Lance,
You are great. Thank you for all the good info. I started real estate photography with you lightroom Enfuse video. Now I am thinking to switch to Photomatix but still think that Enfuse is more natural. Is there some particular reasons to use Photomatix. I have not tried it yet. I would love to hear your comments first.
Thanks again
Hi Ahou,
I think it pulls in highlights (windows) better. It looks just as natural as Enfuse as long as you don’t over saturate the processing.
Thank you Lance, I would definitely try it.
I am just starting to learn about the business and this website has been very helpful. I look forward to every post.
Glad to have you here Shannon!
Hey Lance!
Question… I did my first shoot with photomatix a few days ago. I take 7 bracketed exposures and then delete the extremely over/under exposed ones but only if they’re REALLY bad. Im not happy with the end result blending through the windows, its just not as good as i’d like. I wouldn’t consider it to be on par with what i’ve seen from other photographers who i think are also using photomatix. I’m wondering if 3 pictures that are taken closer to an ideal exposure is the answer to a better end results after blending. One photo property exposed for interior, one through the windows essentially exactly the way I’d like it to be and one in-between? Of course I can troubleshoot an answer to this for myself but just wondering if you could shine some light on this from your own experience?
I live in an area with great views and lots of tree’s etc so its especially important for me to be able to do this part well.
Thanks!
Micah
Micah,
I am finding that doing 7 has ended up with great results, and letting the camera figure out the bracketing/exposures. Also I am pretty certain the lower the steps between each frame, the better. So for example it would better to 9 shots 1/2 a step apart, instead of doing 5 shots 1 stop apart. Definitely give it a try. I just this week started letting the camera choose the exposures and I had blends that had almost all black frames and almost all white frames and they came out great.
Lance,
I just found your website and I wanted to drop a comment just to say “Thanks” for running what looks to be an active real estate forum.
Glad you found it Eric! Hope you can get some info from my posts to help you out in your real estate photography adventure!
Hey Lance… Great video, thank you for the helpful tips. I attempted to use this process to batch my interior images but when I changed from the default “process” to “advanced selection” Photomatix would not load my source folder… If I switch back to the default “process” the folder would load properly. Any idea why this is happening? Thank you.
PhotoMatix is a bit tricky in that you need to make sure you are either selecting a Folder or Files as the source, and then on top of that, you need to check “Process Subfolders” box if necessary. If you have all of your brackets in one folder, you would choose “Folder” as the source, hit the Select Source Folder button and find the folder and open it. That should dump all of the files in the source list. If you have multiple shoots that you want to do at once, you can put them all in subfolders. So your structure may look like /MyShoots/Shoot1/*.jpg and /MyShoots/Shoot2/*.jpg. Where Shoot1 and Shoot2 are folders that contain jpgs of your brackets for each shoot. In this instance, you would select Folder again for the source, but this time you would select Process Subfolders. Then when you click the Select Source Folder option, you would find the MyShoots folder and open. It should then populate with the brackets from each shoot.
Not sure if that makes sense, but try playing around with those selections. Good luck!
Hi Lance! Just wondering what your thoughts are on Lightroom’s built in HDR merge program that’s now standard in CC. Is there still a need for Enfuse or PhotoMatix? I’m just getting started and am trying to figure out what program will yield the most realistic results.
Your site is awesome! Thanks for sharing your knowledge!
Are you referencing HDR in Photoshop, and not Lightroom? I don’t have the latest Lightroom I don’t think, so if they added HDR I am unaware!
But I always tell people – use the trial of PhotoMatix and compare to what you can do in PhotoShop and see what you like better. It may be easier to batch in something like PhotoMatix, but I’m not familiar with using Lightroom and/or PhotoShop for HDR work.
Hi Lance i notice that when you export full jpg for photomatix processing you do not alter the size and resolution is set to 72dpi. Does this mean the export is in low resolution does it not matter? Cheers. Gary.
Hi Gary,
My understanding is dpi/ppi isn’t a factor until you go to print. On the computer, one pixel is always going to equal one pixel. So regardless of what the resolution is set at, the width/height in pixels of the image is going to be the same when it comes to processing on the computer. I only start thinking about dpi when I need to talk to a client about printing, and I let them know that they can print it at whatever dpi they want, which will determine how big/small the print ends up being.
Hi Lance,
I just discovered Photmatix after doing this process manually in Lightroom and it is quite a time saver. Would you be willing to share with me how your are able to keep the lights in lamps and ceiling fixtures etc from be so overexposed. I am never able to bring them back to a normal level in post processing.
Thanks again for sharing your processes.
Fred
Hi Fred,
I don’t do anything special! I just blend with PhotoMatix and get what I get! Some times they are blown out, some times they aren’t.
I don’t always 100% adhere to all the lights always on. If I have a halogen spot facing directly at the camera, I might turn it off to reduce the blow out of this light, or I might face it away from the camera. If it is too objectionable, I guess the only answer is to do some touch up in post.
Generally, I try to reduce the time spent fusing with photos.
With the Enfuse plug-in you were able to sort the images prior to exporting them if you had the folder selected. This method seems to create additional folders? Do you now export the interiors and exteriors separately?
Hi Rich,
Yes I export first the exteriors, and then the interiors. They are exported into their own respective folders prior to blending.
Thanks Lance! I appreciate it. File management is pretty tough as once there are subfolders it won’t let your sort the files before the final export. Trying to come up with a method to keep it all straight is tough.
Lance, hi.
Nice content.
As a long time realtor/broker in Wyoming, I was excited to be able to work with a British company in the creation of a photo editing software package specifically designed for real estate agents.
Photomatix Essentials RE allows novice photographers to dramatically improve the quality of their interior real estate photos with little effort on their part.
I would love to send you a press release on this software
Hi Lance, if you wanted to fix the color cast in the image above you can rerun photomatix and change the wb to 5200 or whatever it is outside, then blend the two in photoshop. A little extra work, but your wood floor would be brown again on the left.
That’s possible, or lately I’ve been just painting with the brush in Lightroom over any blue areas and bumping up the temperature a lot. Then the frames are exported with less blue in them, resulting in a better final image from Photomatix.
Thank you – just starting out so I really appreciate your great info!
Found this article really useful in clearing up a few issues I’ve had shooting HDR for real estate. One thing I wondered is how you meter – evaluative, partial, spot or center-weighted? I’ve been using spot and metering the darkest part of the room with 7 bracketed images and then re-composing. Had occasional off images which are hard to edit afterwards. I’m all about making my workflow onsite and while editing efficient.
Any quick blue sky blogs either?
Thanks so much!!
I don’t have a quick blue sky blog – I outsource my exteriors for that reason because it’s too time consuming putting new skies in all the exteriors!
I just recently looked up how PhotoMatix states you are supposed to take the brackets. Why I didn’t look it up long ago, I don’t know! They suggest 5 brackets, 2 stops apart, making sure your first image (darkest) has the histogram ending at the 2/3 mark. Meaning the highlights in the histogram end in the midtones section of the histogram. The last image (lightest) has the histogram starting in the 2nd 3rd section of the histogram. So the shadows (left side of the histogram) shouldn’t show up until you reach the midtones starting point of the histogram.
I just started using these rules on shoots and have noticed a significant quality difference. I get less muddy areas around windows, and I think it’s because I’m overexposing so much now, where I was too afraid to in the past. So I’m lightening up the shadows a lot. I ended up going to 2 and 1/3 stop between each bracket in order to cover that full range.
I don’t meter anything. I know if I’m shooting something that’s pretty much in the middle that I can be at 0 exposure compensation. If I’m shooting into a window, I need to be at +1 2/3 or so exposure compensation for the brackets. I take the brackets and they generally reach the range I need. If not, I quick delete and just modify the compensation whichever way I need to go to get it right. You could probably put your camera in Live View mode if you have it, and show the histogram, and adjust the shutter to get the exposure right for the darkest bracket of the set. Then you would know where you need to set your compensation to get the brackets how you need them.
Lance
I too have been experimenting and found that if I set the histogram to as close to the center for a balanced exposure, and since my gh4 can only bracket 1 stop apart I shoot 7 brackets to give me plus and minus 3 exposures. I was hoping the gh5 would allow 2 stops in bracketing but it appears to be one also, don’t understand why they do that. I did a test also using exported jpegs in Photomatix on a shot that came out muddy looking and then ran it with DNG files and the DNG export from photomatix looked much less muddy looking. I also thought about using 3 brackets and shoot the darkest area and then do the same with the lightest area, easy to do with spot metering and touch screen on gh4, I believe your canon works the same way too. I can’t do the 5 brackets at 2 stops each like yours can but I’ll try setting the histogram as you mentioned Photomatix recommended and see if that helps.
Thanks for all your input Lance!
Jeff
I have actually just started messing with my brackets as well. I am going to write a post about it, so stay tuned. That’s very interesting about the DNG test you did – I need to give that a shot because muddiness is one of the worst downfalls of HDR!
Do you correct WB when you first import into LR or when you finish in LR after doing the photomatix process? Thanks, great information all in one area.
Import, color balance, export, photomatix, import, final touches.
I’ve seen people reduce highlights and up shadows in Lightroom before HDR process. Have you found this helpful. Seems like you might lose quality. Thanks again.
I haven’t tried – but that doesn’t mean it won’t work! Give it a shot, do some comparisons and see if it works for you!
Question about this tutorial. I see that it was written back in 2015, but the 2017 version of Photomatrix is a bit different now. For example, there doesn’t seem to be a Preset called “Fusion/Real-Estate”. There is one for “Fusion/Interiors” though. Unfortunately there isn’t the ability to set the settings mentioned above (Highlights, Shadows, etc) to exact numbers like “-10”, “10” or “0”. Do you have a more updated tutorial for Photomatrix? Thanks.
Hi there!
Yes v6 is out for PhotoMatix and the tutorial was written with the prior version. You can get a similar result using Fusion/Interior as you suggested. Try these settings out for your starting point and make adjustments where needed.
Interesting… there must be a bug in the software. I don’t see those setting numbers (to the right of each setting) for Highlights, Shadows, Local Contrast, Color Saturation, Highlights Depth IF I select any of the Fusion Presets. They do show up for all of the other presets though. I’ll report this to the Photomatrix people…
Weird! Hopefully they can figure something out!
Lance, I contacted the Photomatrix team at HDRSoft to report this issue. I’ve been corresponding back and forth with them for a couple of weeks. As it turns out, it IS a bug that they identified for any PC users running Windows 7 and a fix is now in the works. On a side note, their support and development team has very responsive and although I was looking at other comparable tools, I’ve decided to go with Photomatrix for this reason.
Glad they are working with you!
Hi Lance thank you very much for your wonderful tuto, but perhabs i miss it, i didnt see the link for the real estate preset you used for photomatix and lightroom.
Dis you put it somewhere in the description ?
Thank you very much for your help.. .
Hi Rudy,
It’s under the setup portion – I list the settings for PhotoMatix.
Thank you
Hi Lance, I’m just getting acquainted with your YouTube channel as well your blog. So far, I’m really enjoying it all. I am trying to follow along to this particular video/blog combination, but unless I am missing something it looks like your blog ends where you export out of Photomatix and just before importing back into Lightroom. So, this is where I am hung up. I am looking for the preset specifications for Photomatix Interior to import the edited photos back in to Lightroom. Thanks for you help!
Hi Robert,
The theme for the blog got updated and a lot of the layout is out of whack. 🙁 Here is the screenshot in the blog post that has the Photomatix settings:
https://www.tipsforrealestatephotography.com/wp-content/uploads/2015/04/Photomatix-Fusion-Real-Estate.png
Hi Lance! Thanks for the screenshot. It looks like might have explained the wrong spot. I was referring to about 10:12 into the video where you mention a preset you use to import back into Lightroom. Do you happen to still have that available to view as well?
I’m stuck at this same spot as well.
Also wondering about this “Photomatix Interior” Preset for Lightroom…
I don’t edit much with presets – just come up with something you like using the adjustment sliders and save it as your own!
Hi Lance! Great video, really helpful!
Question: where can I find how to set the ”Develop settings: Photomatix interior”? I also saw that you have one called exterior. How can I set those two settings?
Many thanks!! 🙂
Oops I think I just found it haha! 😉
Ah nah it’s the wrong one. It’s actually the same question as Robert…
Do you have a Lightroom and Photomatix preset for Exteriors? I understand you use Enfuse, but wondering if you have anything currently.
Contrast +52
Highlights -31
Shadows +34
Luminance (Blue) +10
Enable Profile Corrections
I would bet if you set lightroom to pull down the highlights 100% on all the raw files before running enfuse you would find the final result improved over what you have above. It seems to have no downside. Also, I have found that pulling up the shadows on raw files before processing can also make for an improvement depending on certain images