You took the time to record clips for a real estate video tour. But that is only half the battle! The final piece is editing a real estate video walk-through so you can deliver it to your client. One of the ways you can edit your video is by using Final Cut Pro X on a Mac.
Real Estate Video Tour Editing
After you have completed recording video clips of a property, it’s time to edit to produce the final product! There are numerous software options for editing real estate video. We’ll be using Final Cut Pro X in this tutorial, however the actual editing techniques can be applied to other software like Adobe Premier. Follow along and then utilize these tips in your software of choice!
1. Create an Event / Project
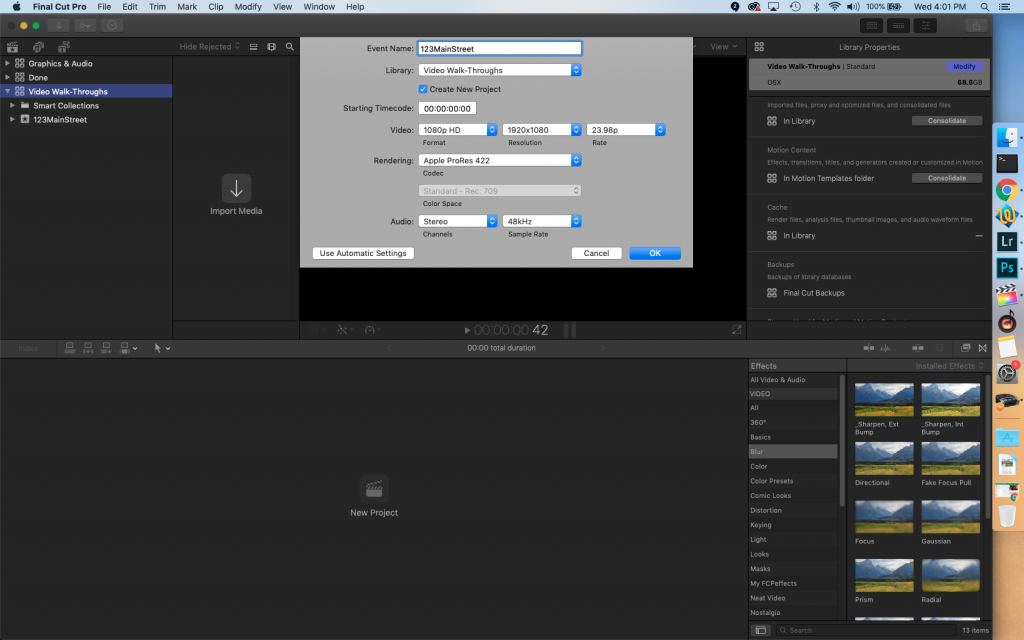
Start by creating a new Event and Project. You can name your event after the address of the property so you can keep all of your real estate videos organized. In the example, we right clicked on Video Walk-Throughs in Final Cut Pro X and selected New Event. We named the event ‘123MainStreet’, and selected to Create New Project. Adjust the Video settings as you see fit – in this case 1080p @ 23.98fps.
2. Import Media (Video Files)
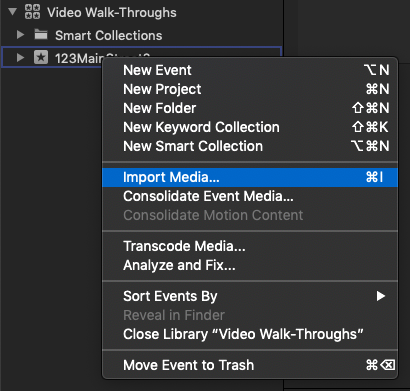
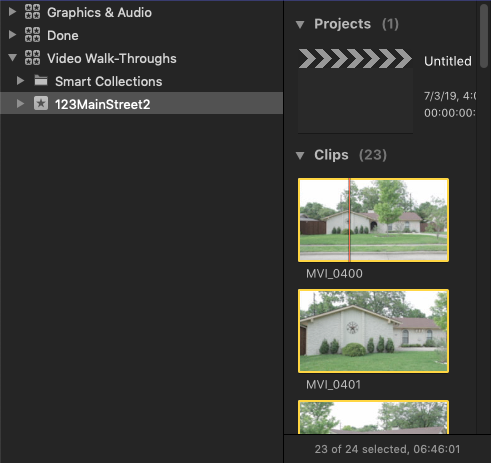
Once our event and project is created, we can add our video files. This is done by right clicking on our event and choosing Import Media. You’ll be presented with a folder view of your computer where you can find and select all of your video files.
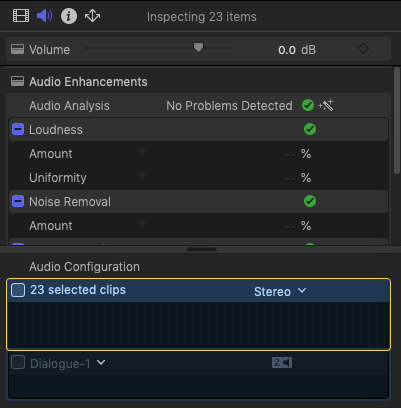
3. Remove/Disable the Clip Audio
Once you have all of your clips imported, you can remove the audio tracks in one bulk step if your camera recorded audio. Removing the audio just makes things cleaner during the editing process, so when you play back what you have edited, you won’t hear background noise from when you recorded the clips.
Select/highlight all of the videos under the Clips section.
Then in the Inspector window to the right, click on the Audio (speaker) icon, and click the checkbox under Audio Configuration. This will remove/disable the audio for all of your selected clips.
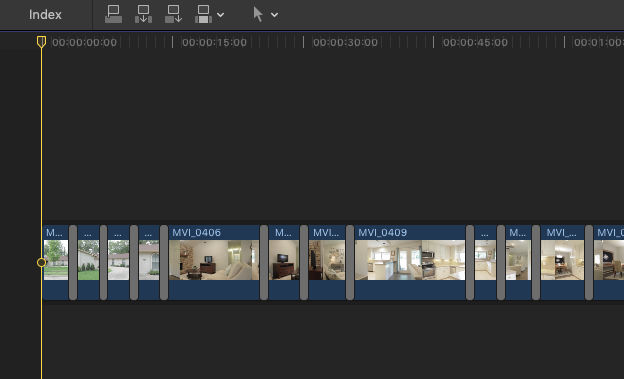
4. Start to Create the Video
It’s time to start the important part – adding clips to the timeline to create what will end up being our real estate video tour! Select only the portion of the first clip that you want to add to your timeline. Click and hold and drag it down into your timeline. Or for a shortcut in Final Cut Pro X, simply hit ‘E’ to add it to the end of your timeline.
Clip Length
The length of your clips is up to you. A good rule of thumb is to keep them short and sweet. Show enough of each clip to get the point across. At the same time, if a clip needs to be a little longer to showcase that portion of the home, so be it. A good clip length to start at is around ~3secs.

Keep adding clips until you have the whole video tour created. You’ll notice clips of varying length below. For now, just focus on completing the tour, as editing/tweaking will happen later.

5. Add a Dissolve Transition Between Clips
Select all of your clips except the first and last ones. In the lower right, click on the Transitions Browser icon. Then click on the Dissolves transition group. To the right you’ll find Cross Dissolve.
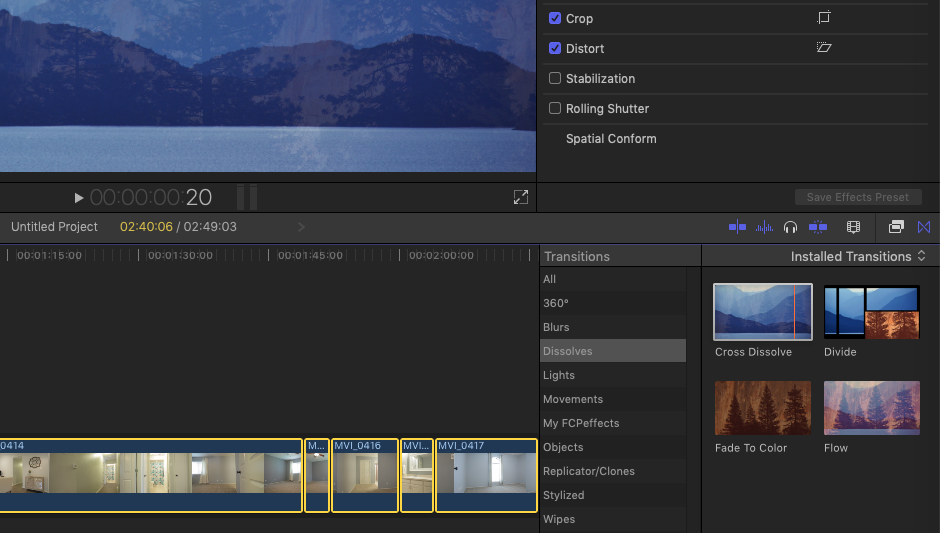
Double-Click Cross Dissolve to add a transition between all of the clips that you have selected in your video. You’ll see a grey bar between all of the clips, representing the transition. You can press also play (shortcut key ‘Space’) to preview the transition between a couple of clips.
The reason we don’t select the first and last clip is so the transition doesn’t get applied to the beginning or end of the video. If you want a fade-in or fade-out, you can absolutely add the transition at the beginning and/or end.
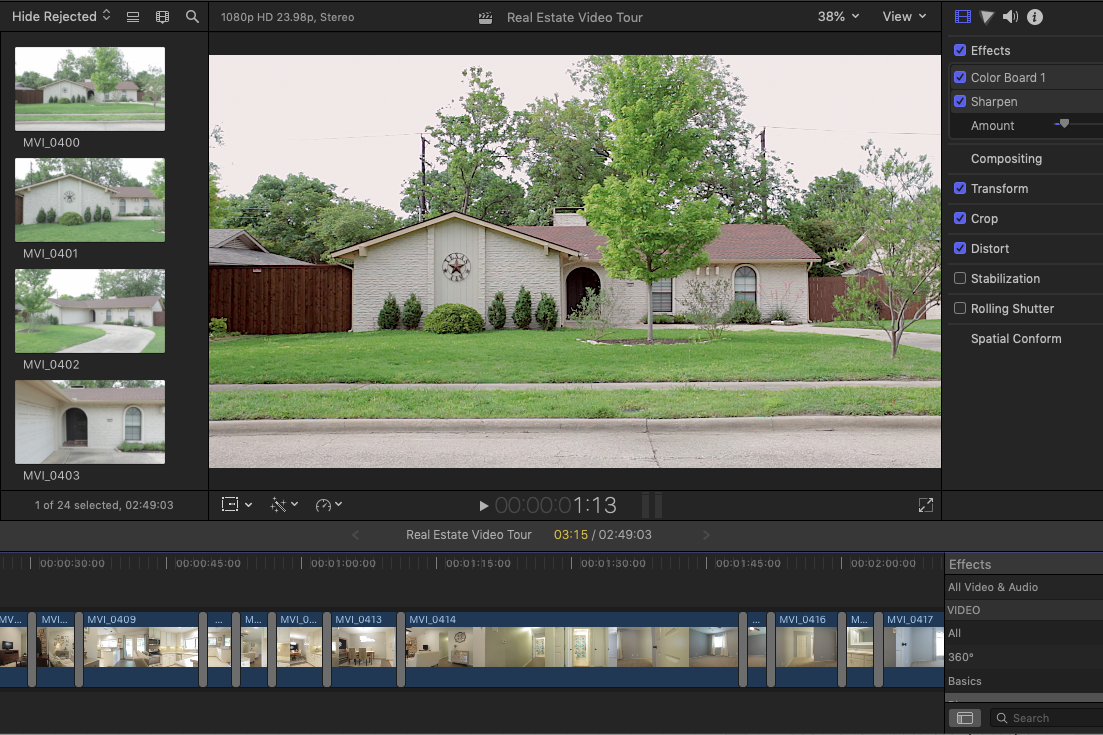
6. Lightly Enhance Video Clips with Color and Sharpness Adjustments
Key word: lightly! Don’t over-do it. It’s similar to when you find out how to smooth skin on portraits, and all of the sudden your faces look like porcelain dolls! Make minor adjustments and try to represent the property accurately.
Add a Color Board
– Click on your first clip, which should be the front exterior.
– In the lower right, click on the Effects Browser icon.
– Then click on the Color Effects group.
– Now double-click on the rainbow Color Board Effect.
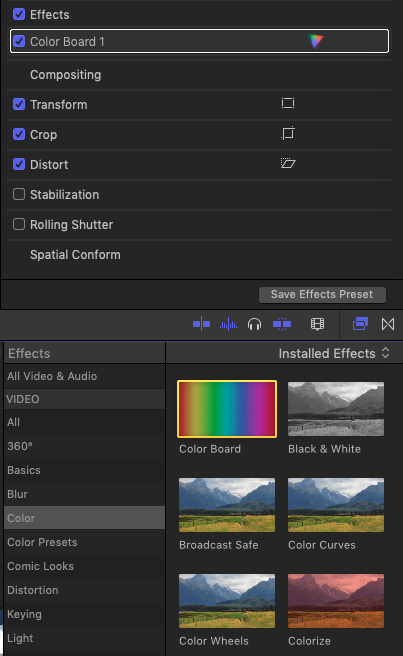
– You’ll notice in the top, a new setting will be added called Color Board 1.
– Click once on the rainbow triangle icon.
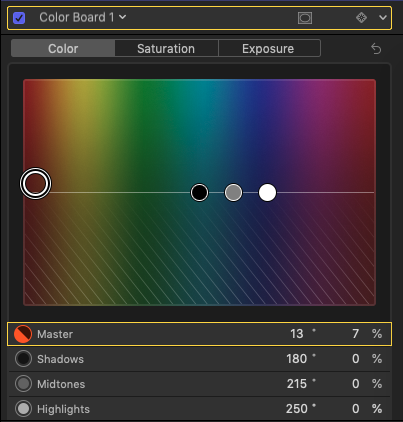
Adjust Color, Saturation and Exposure
– With the Color Board Settings visible, start on the Color tab.
– Adjust the Master pill icon to adjust the color of the clip to your liking.
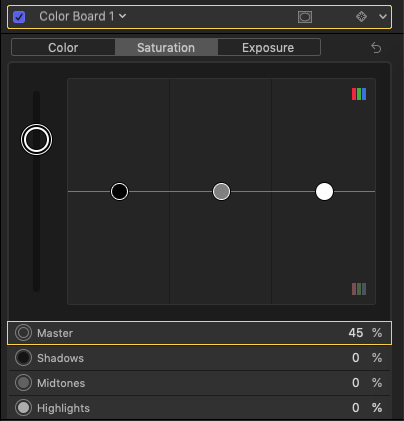
– Switch to the Saturation tab.
– Adjust the Master pill icon to the desired saturation. If you film with a neutral profile, you’ll likely need to boost this up.
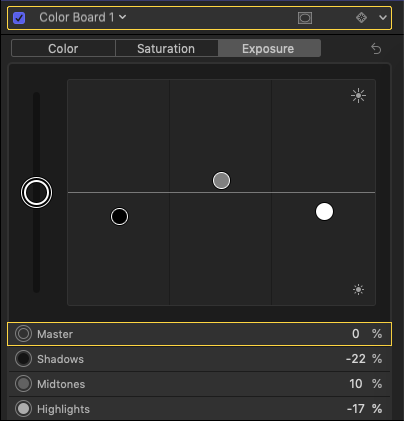
– Switch to the Exposure tab.
– Create contrast by adjusting the Shadows and Highlights pill icons down, and the Midtones pill icon up.
Add a Sharpen Effect
– Your first exterior video clip should still be selected.
– Click back on the Effects Browser icon.
– Click on the Blue Effects group.
– Double-click on the Sharpen Effect.
Adjust the Sharpness Amount
– In the top right panel, find and click on the Video Inspector Icon.
– You will be back to the view where you can see the Color Board 1 item listed.
– A new Sharpen item is listed.
– Expand it if necessary, and adjust the amount.
– 7.0 is a good amount, but choose one that doesn’t look too sharpened for your video clips.

That’s it for editing!
Well, the exterior anyway. But it’s as simple as that! Minor adjustments that will improve the quality and enable you to provide a professional video to your real estate agent clients.
When you add the Color Board and Sharpen Effects to your interior clips, you’ll do everything the same except adjust the amounts. Change the color based on what looks best for the interior clips, and adjust the Saturation/Exposure/Sharpness to get a polished look.
Quick Tip
Utilize the ‘Save Effects Presets’ option in Final Cut Pro X to make your adjustments quicker! After you are content with your adjustments of your first exterior clip, click the ‘Save Effects Presets’ button.
Give your preset a name, choose an appropriate category, make sure the ‘Color Board 1’ and ‘Sharpen’ boxes are checked, and hit Save.
Now you can select the remaining exterior video clips and apply the preset with a single double-click after finding it in the Effects Browser!
Because your settings are different between exteriors and interiors, make a preset for each.
You should now be a real estate video tour editing master in Final Cut Pro X!
Maybe not, but hopefully if you are stuck, this will give you a guiding hand.
Remember – there is no right or wrong! Make sure you don’t limit your edits to what was discussed in this tutorial. Be creative and think outside the box to make your product unique to your real estate photography business!
And don’t forget to check out tips on settings and how to record footage at the property.
Final Video
For reference, here is the video that was created while writing this tutorial.
