The housing market can be incredibly competitive. Especially in the coming summer months, homes upon homes will be listed and advertised, hoping to draw in hungry new home-buyers.
When it comes to such a crowded field, a picture is definitely worth 1,000 words. But you want to make sure those words are positive ones. Excellent real estate photography can make a home sparkle and shine, while poor photography can send would-be buyers running for the door.
It can be tricky getting the perfect shots for your agents, and there can be many challenges involved. Read on, and I’ll walk you through a few real estate photography tips to help ensure you can get the perfect shot every time.
1. Make A Plan Ahead Of Time
The number one mistake most new real estate photographers make is not being properly prepared. Many plan to stroll into a property, snap a few pictures, and head home. But it’s not as easy as that if you want quality results. Many of these photographers return home only to find they’ve forgotten key areas of a property (happened to me the first couple of shoots).
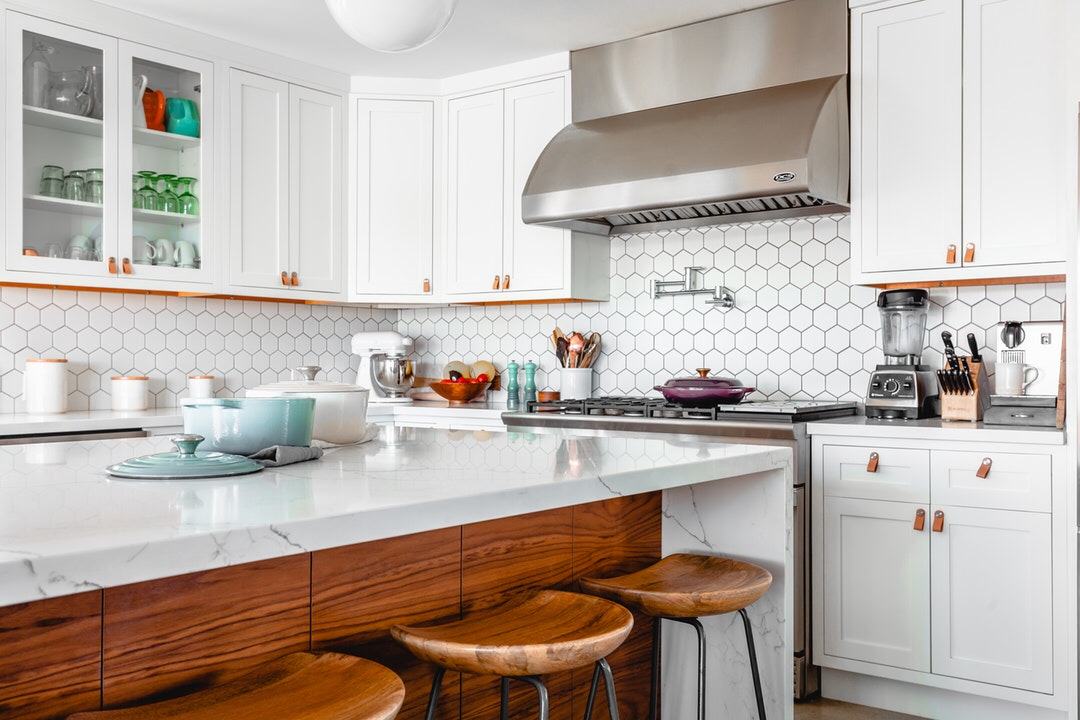
No two homes are identical, but it can be helpful to create a stock list of images you’ll want to gather. You know you’ll need 2+ wide angle shots of the main rooms: the kitchen, the living room, and the master bedroom.
You’ll probably only need to snap one shot of the bedrooms/bathrooms unless they are particularly notable or spacious. Same goes for highlighting the features, such as a laundry room, garage, and pantry.
You’ll then want to get one or two photos of the backyard, and one or two of the front of the home that shows off the curb appeal.
Missing any of these areas can result in a listing that misses the mark. If you go in with a checklist in hand, you know you can leave without having to worry about missing something.
2. Declutter A Home Before Photographing
When a family gets comfortable in a home, it’s natural for items to build up and begin to take over surface areas. It’s unavoidable, even.
But while this might feel natural in a lived-in environment, it will stand out like a sore thumb in a photo. It’s essential that you properly declutter and stage your rooms for the most attractive presentation possible (or make sure the agent/seller does it before your arrival).
Two or three decorative items per room can be a nice touch, but anything more is likely to turn viewers away. If you’re looking to move items out of the way, most can be deposited in closets for the duration of your shoot. These closets won’t need to be photographed unless their interiors are notable.
Most of the time, you can ask the homeowners to put away such belongings before you arrive. When you arrive, there still may be items out. Even if you feel rude, it’s essential that you ask the homeowners to move these items out of sight. Most won’t mind, as they’ll feel better in a cleaner home regardless.
It’s best to do a quick walkthrough of the home before you start shooting so you can spot anything that might need to move.
3. Deciding On Lighting
Each house you’ll photograph will be its own unique situation. You’ll need to be able to quickly make decisions based on what you see in front of you. One of the key situations you’ll make will have to do with the lighting.
There are pros and cons when it comes to turning the house lighting on or off. Turning the lights on tends to help make a space feel warmer or more inviting. But if there’s daylight coming in, it can give your image competing light temperatures that can be disorienting.
Using just natural daylight from the windows gives you an equal lighting temperature. But it can also give rooms a cold or detached feeling as well. You’ll need to make a decision based on what’s best for the home in question and what the agent prefers.
Once you’ve made your call, make sure to stick to the same decision for all of the rooms that you photograph.
4. Using Flash Photography
Despite the lighting situation, you’ll likely want to use a flash to help brighten or highlight areas of a room that have fallen to shadow. Using a flash unit attached to your camera can keep things simple and efficient.
When using a flash, however, you need to be sure that you diffuse the light properly. Pointing the flash directly into a room can create an ugly image. There will be a bright spot in the center of the room with harsh shadows around objects.
Instead, point your flash towards one of the white walls of a room. The light will hit the wall and bounce off it, naturally throwing light around the room. It will result in a much more aesthetically pleasing image.
(I’ll go into how I use flash for certain projects at a later date.)
5. Use A Wide Angles Lens
This should go without saying, but you’d be surprised at how many people don’t use the right lens when photographing properties. You’ll want to use the widest angle lens you have for your camera to best capture rooms.
You’ll want to ensure you’re getting the full scope of a room in every photo you take. You don’t want to go too wide (no fisheye!) but you will want to get as wide as you can without distorting the image.
The Best Real Estate Photography Tips
A good set of images is the key to selling a home in a crowded market. The above real estate photography tips can make sure you’re getting shots that will do just that, and build up your repeat client base for a successful business.
Did you ever discuss how and when to use flash it your photography? I’m just now entering this field and this seems like such a valuable topic to learn about!
I haven’t yet, but need to! 😉