I’ve had my Manfrotto 190XPROB (Note: Manfrotto has discontinued this model and have replaced it with the Manfrotto 190XPRO3) tripod for over 4 years and haven’t had any issues with it, until the other week. The thumb screw that goes into the center column to hold the center pole in place stripped. I had to order a new thumb screw from Manfrotto (call them – their online contact form is worthless) and thought it would be a great time to clean my tripod while it was down for the count.
Why Clean
When my main tripod screw stripped, I went and purchased another Manfrotto 190PROBX so I could continue shooting the shoots I had scheduled without any delay. Using the new tripod made me realize how nice the levers worked compared to my 4-year old version. Although I could have just adjusted the levers and tightened everything up, I thought it would be a great time to do a good cleaning.
What You Need
Taking the tripod apart and cleaning it is relatively easy. I used the following:
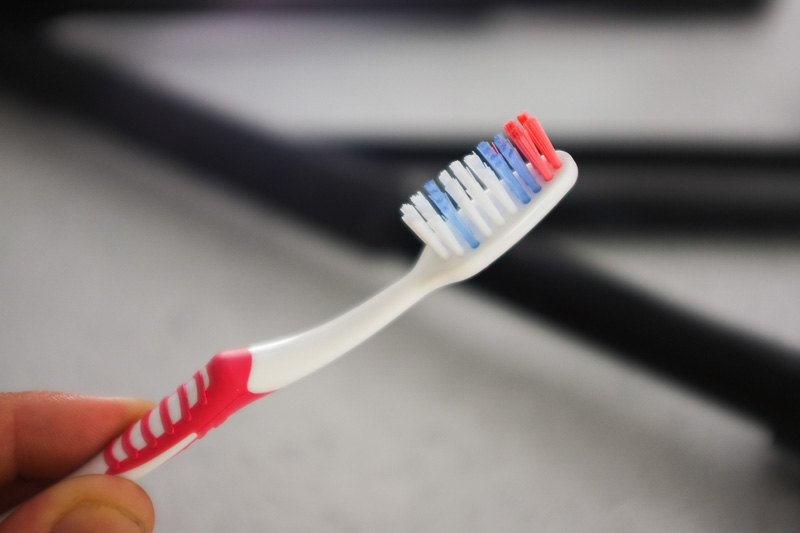
- Toothbrush to do the scrubbing in tight places
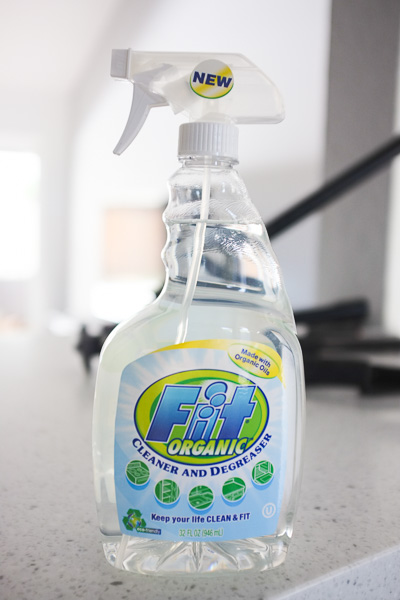
- Organic cleaning/degreaser (nothing too abrasive or strong)
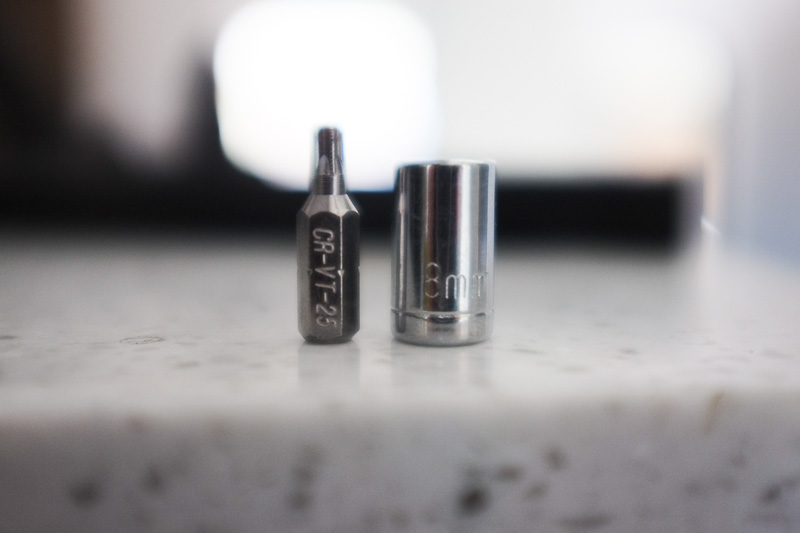
- Torx 25 (star-type driver)
- 8mm Socket Wrench
- 4mm Allen Wrench
- an hour or two of time
Step One
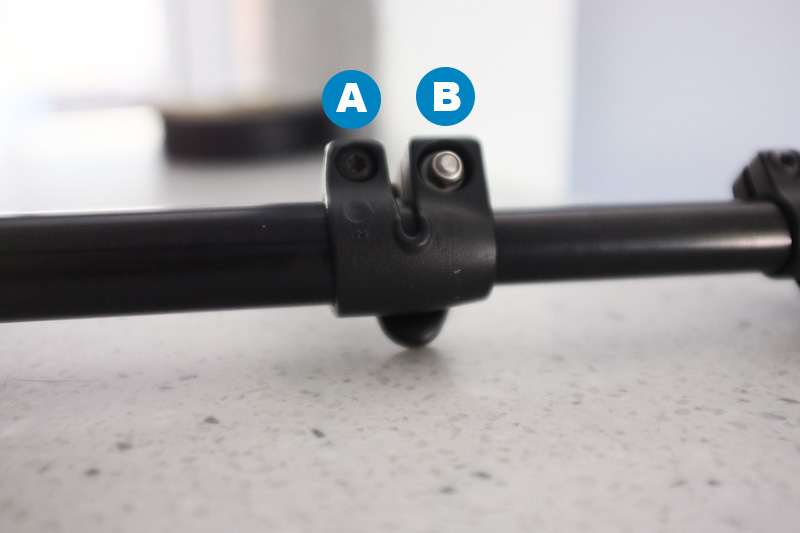
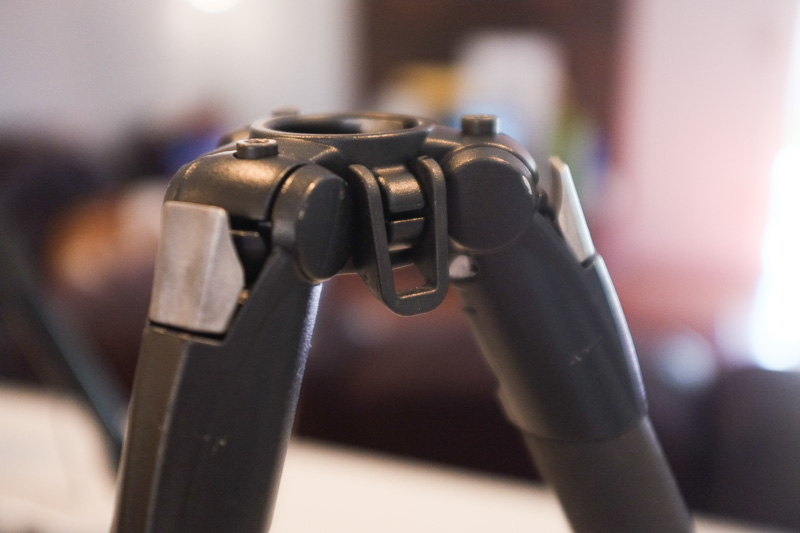
The first thing I did was disassembled all the legs at the clamps. The clamps are made up of two bolts that do different things. The first bolt (A below) is loosened with the Torx 25 driver, and it holds the clamp onto the leg itself. This is the bolt you’ll want to loosen in this step. Once loosened, you can pull the leg sections apart. The second bolt (B below) can be loosened with the 8mm socket wrench and it controls the tension on the clamp lever when you are using your tripod and extending the legs. We’ll adjust the tension bolt at the end.
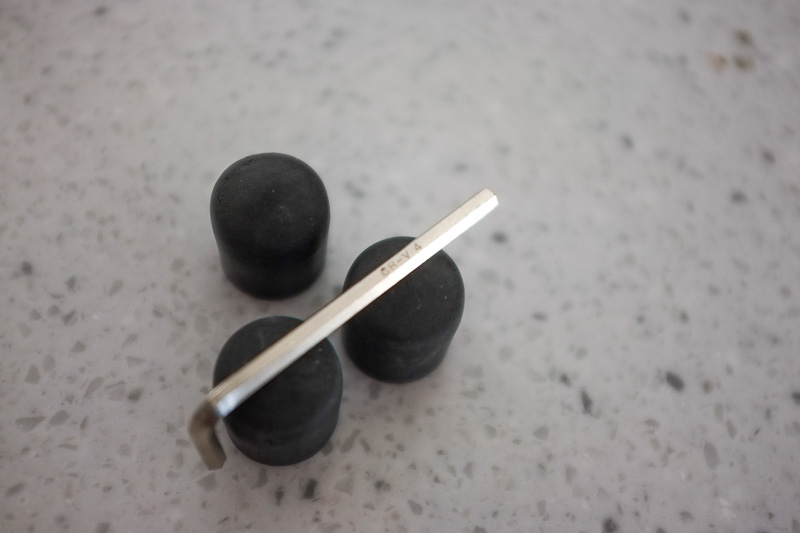
The rubber feet on the bottom sections of the legs simply slide off – just pull.
Step Two
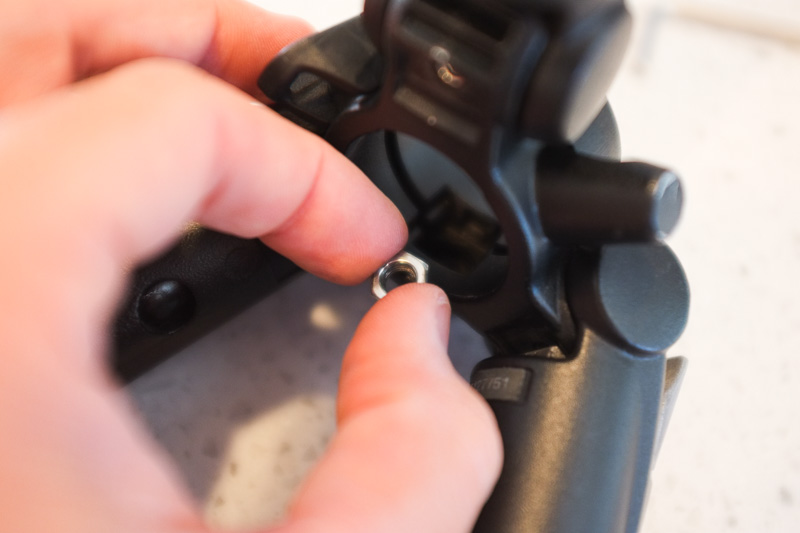
Remove the center post by loosening the thumb screw, and pulling the center post out. The bottom of the center post has a button that you press that will allow it to come out of the upper tripod assembly.
Step Three
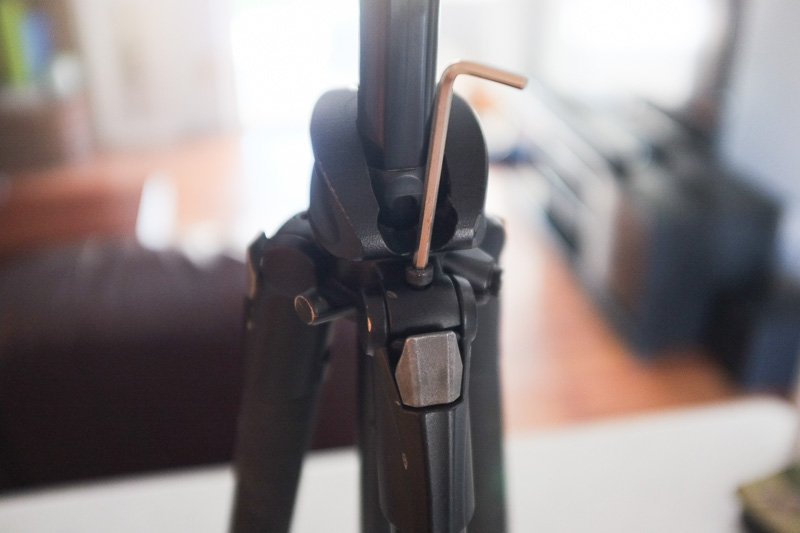
Remove the legs from the upper tripod assembly by using the 4mm allen wrench to take out the screws that go into the top of the legs. Be careful! This is the only step where you’ll find loose parts and they can go flying.
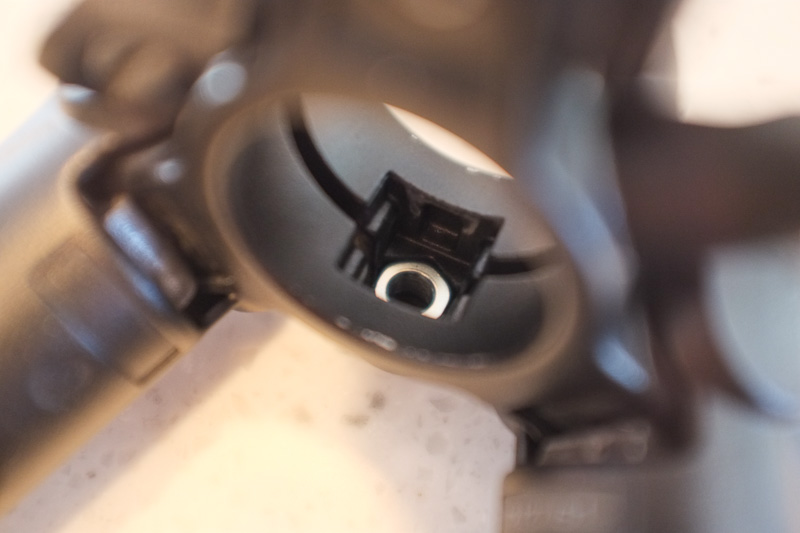
When you take out the last leg screw, the legs will all be free and the upper tripod assembly will separate. Inside is a nut, a spring and a metal square piece. They work together to hold the center post in place. When I took mine apart, the metal piece and spring went flying so keep an eye out for it. There is also a black plastic piece that looks like an ‘A’ that will be a loose part during this step.
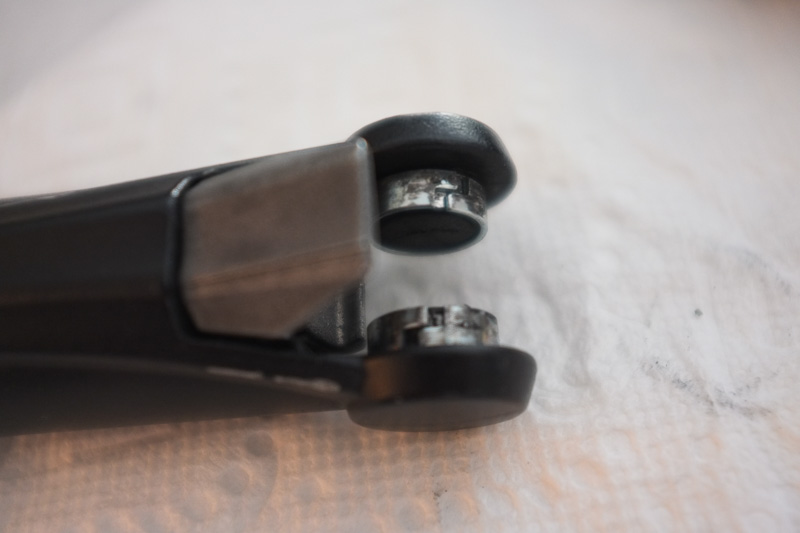
You’ll see metal bands around the end of the legs that attach to the upper assembly. Those metal bands simply slide off for cleaning.
Step Four
Time to clean! Here are all of the parts that you should be looking at.

Take the toothbrush and cleaner/degreaser and spray and scrub all of the joints. For each of the legs, I scrubbed the outside and inside of both ends. Scrub the clamps and metal bands to get rid of any dirt particles that might be on them.
Step Five
I used a towel to get everything as dry as I could, but I didn’t want to put everything together with some pieces still wet. I decided to let everything air dry over night. This step is probably optional, but if you have the time to spare it probably isn’t a bad idea.
Step Six
Ready to put everything back together? Most of it is self explanatory – just put everything back together in the opposite order you took it apart. However the center assembly with the nut, spring and metal piece can be a little challenging. Here’s what I did to get the pieces in the right spot.
Attach the top leg portion to the center assembly with the screws, but don’t tighten them all the way. Keep them pretty loose. The center assembly pieces in this photo are just resting on each other and not tight. Make sure to also put the plastic ‘A’ piece in its spot during this step, as seen in the photo.
Flip the tripod on its side so the hole on the inside of the center assembly where the nut goes, is on the bottom. Take the nut and drop it down in to the hole, making sure to line up the hole correctly with the nut. It should fit perfectly and sit down flush into the center assembly.
The spring just sits on top of the nut – nothing fancy here but it is a little difficult working with it since it doesn’t get attached to anything.
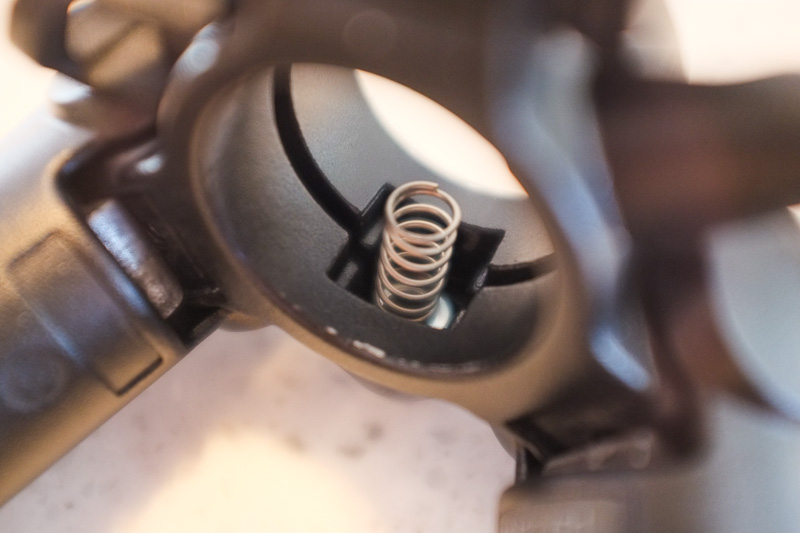
The square metal piece sits on top of the spring. There is an indent into the metal piece that the spring fits into. The flat/curved side of the metal piece should be facing where the center post will go once reinstalled, and the little metal tabs should be on the bottom and top.
This is where it’s important to have the leg screws loosened enough to put everything back together. You need to press the square metal piece down into the hole, and you’ll need enough clearance for the tabs to fit inside. Once you have the metal piece in place, use your hands to clamp down the center assembly together. You can then tighten the leg screws to hold everything together.
When everything is tight, the square metal piece should protrude to the inside of the center assembly slightly, and you can press it in due to the spring being inside. To reinstall the center post, you can press the metal piece in, and slide the center post into the center assembly.
Step Seven
With everything clean and reassembled, it’s time to make final adjustments to the tension clamp levers to your liking. Adjustments should be made with the lever in the OPEN position. Unlatch one of the levers so it is sticking out, then use the 8mm socket wrench to tighten the bolt behind the lever. Make minor adjustments and test the lever tension until you get it to the tension that feels comfortable. Remember that you need it tight enough so the legs hold. If it’s too loose and you put a heavy camera on the tripod, the legs will start to slip/slide and won’t be able to support the weight.
Conclusion
Is it necessary to clean your tripod? That I don’t know. I definitely cleaned away a lot of black grime after four years of abuse. I don’t know if cleaning will extend the life of the tripod, however it surely can’t hurt!
I also have a Manfrotto 055XPROB that is pieced together in the exact same way. It will just require different sized drivers/wrenches to complete the job.
I have the same tripod, so I just might need to do this some day. Thanks for the post!
Kansas City real estate photography
You’re welcome! It’s a beast!
This whole procedure, over a long enough time period will eventually become mandatory. if your tripod lives in a studio, you might pass away before it ever needed this type of in depth cleaning. However, if you have a tripod that can’t help but go off-road, this procedure will eventually be staring you in the face if you haven’t taken minimum precautionary measures regarding the cleanliness of your tripods legs. Especially at THE BEACH! I am a Manfrotto fan myself and have owned a 190cx4pro, an MKCOMPACTLT-BK and the tripod that makes this entire article ring absolutely true, my aluminum 293 with stock MK294C3-D3RC2 3-axis head. This tripod proved to be an ultimate beast of burden. After many off-road and beach adventures I grew complacent to it’s cleanliness due to it’s lower price point and ready for action ruggedness. This cavalier attitude would eventually cause a problem that later would develop into a moment of shear terror as I watched my 7D and 16-35mm L come crashing to the ground. It all started with not wiping off the legs completely when you shoot at the beach. regardless if it’s wet or not, the moisture in the air will allow sand to collect on the outside of the leg, then you will retract the legs, pushing that abrasive material inside each telescoping section. This will score the finish and in my situation resulted in extremely tough manipulation of the leg sections. In one fateful situation for me I believed my legs were locked when they were not. WIPE YOUR TRIPOD LEGS! I can never again trust my 293, lucked out on getting my 16-35mm fixed, as well as just ordering a Manfrotto MT055cxpro3, an expensive enough tripod that no sane person would feel comfortable treating it without extreme care. Beware of granule type matter around your tripod. Thank you.
I recently experienced the same problem you described above pertaining to a stripped center column thumb screw. The center column thumb screw will not longer tighten or hold the center column in place. Should a new thumb screw fix the problem, or could something be broken inside the collar? I was really hoping that i would not have to take the tripod apart.
Thank you for posting this article.
My guess is the center thumb screw is stripped like mine was. It was hard to even tell – it didn’t appear damaged to my eye but that sure fixed the problem!
Thank you. The nut, a normal 6mm by 1mm thread nut was stripped on mine and your description made it easy to replace it.
Fwiw I put the nut and spring and wingscrew in the top half and then put them together, which may be simpler
Clearly the nut stripping is a common problem, I wonder if they had dud nuts supplied, or it should have been a bigger thread
Glad it helped you!
I have the same tripod, the legs have gone loose when you spread them out. I am trying to see in your steps where you tighten them, do you need to take the centre column out to tighten them?
Hi Thomas,
Mine were loose just recently as well. You just need to tighten the bolt that goes vertical into each leg with an allen wrench. Don’t do it too tight or you won’t be able to close the legs back in! You’ll see. 🙂
Lance
Lance, Its been a couple years since your original post, but wanted to send you a quick note of thanks. I hit two stumbling points:
1. The carbon fiber friction retainer/bands kept failing on one leg resulting in the bottom-most leg slipping free.
2. Since I only needed to work on one leg, I could not see how to free the single tripod leg from the rest of the tripod body even though I unscrewed the tension bolt.
My fixes entailed:
1. A small wrap of plumber’s tape around the friction bands holds these bands in place and prevents the bottom-most leg from slipping free.
2. I re-read you post about 4 times before I realized one must remove all three tripod leg tension bolts in order to release the top of the tripod body, which in turn, then allows you to remove one tripod leg (or all three).
This was the only post out there and again found it very helpful. I’m grateful for your time. Again, thanks!
Glad you were able to get your tripod fixed Jeff! Cheers!
Hello, do you know what to do with a small plastic piece that grips around the center collum that is between the device that lets you flip your center collum 90 degrees? I can’t get it to wedge back between this device since it came apart?
Hi Stephen,
I’m not sure unfortunately! I’ve always wondered what the purpose of that piece was!
Lance
Stephen Crawford
I think it’s some sort of locking tab/washer for the centre red part.
Stephen Crawford
That’s exactly what it is. That part’s number is R1039225 I’ve got a copy of the parts list in PDF format. I can send you it if you want me too. My email is evious1@gmail.com
Hi, I just used my new Be Free aluminium on the beach and dipped inside the salt water to get my sunrise shots. I don’t have all the tools needed since I’m on holiday.
Anything I could do to minimize the sands go inside the tube and also wash the tripod since I found the salt water went inside the tube.
What would you recommend as a high quality low weight tripod with sturdy parts? The one I have has thin plastic sleeves, which are light weight but flimsy. I’d prefer something handy and fairly light to carry around.
Many thanks!!
Good write-up. Remarkable how little information is available on the web for things like this. I’ve got a Manfrotto 055XPROB, and the pieces are the same, essentially. I’ve taken the legs apart many times, as I shoot seascapes and sand in the legs is a chronic problem. This time I took the whole thing apart as I had paint coming off in many sections and they needed to be repainted.
Inside was a damp mess, so I’m glad I did this.
The one thing I did differently is the spring/tab/nut that tightens the center column. That spring pressure kept popping out the tab and spring when I tried putting it together. What I did instead was put in the center bracket that holds the center column, put in the metal tab and spring, and loosely hold all the pieces together as you did. Then I threaded the nut on the T-handle screw, and lifted up the pieces enough to insert it into it’s hole, then turn it in until it seated. This kept the tab and spring in place as they had nowhere to go. Then I locked down the hex bolts. should be a piece of cake next time.
Hi all , just got a 190xb from the charity shop. The little job redoing the paint on one leg has resulted in a complete overhaul so I have found your tips and hints very helpful ( my wife saying I’ve wasted my money , it’s a bag of bits ) so thank you for your help .I’ve never used a tripod before so it’s a learning curve for me as now retired and photography is now a rekindled passion but starting to accept I need help in keeping the camera still .
Thank you once again for your help even if a little old